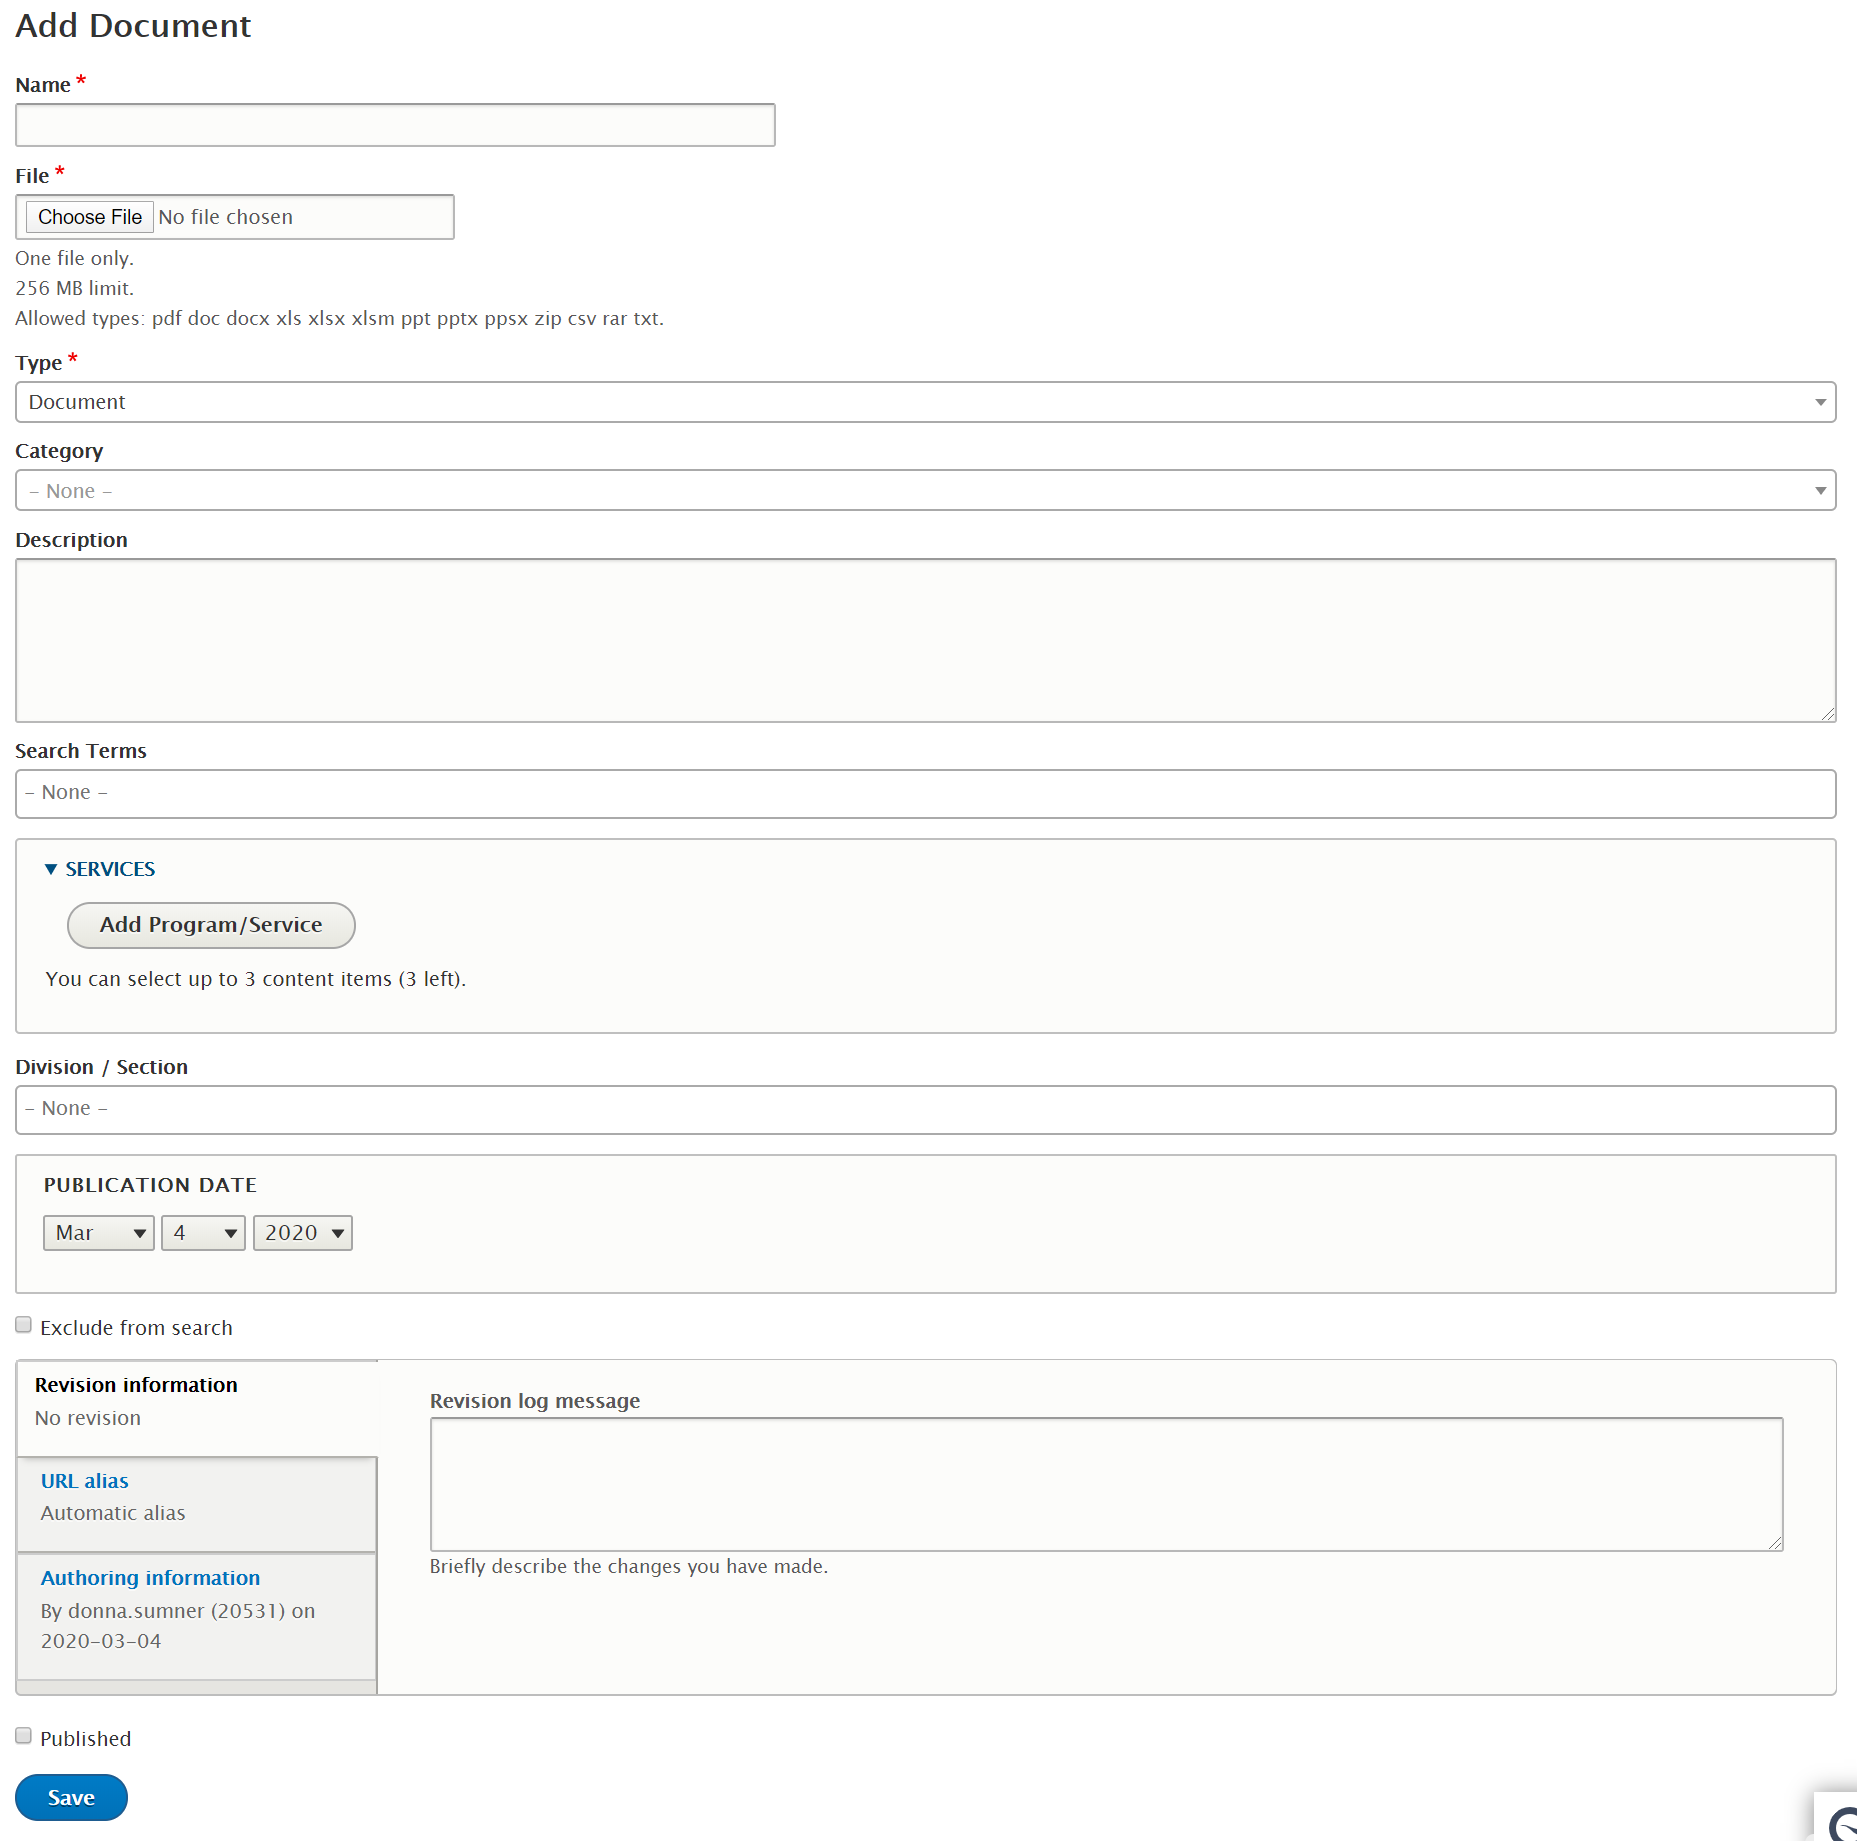
How to upload a Document
- Log into your agency website.
- Click on Add Content > Media > Document.
- Add Name (required). The name will appear in links to this document by default (unless other text is specified at the time of adding a link to the document). Make sure your Name is human-readable and descriptive.
- To upload, click on the Choose File button (required).
- File size is limited to 256 MB.
- File types must be one of the following:
- doc
- docx252px
- xls
- xlsx
- xslm
- ppt
- pptx
- ppsx
- zip
- csv
- rar
- txt
- Select the file from your computer.
- The system will not allow duplicate files to be uploaded. If the file already exists in your Document library, you will get an error message letting you know to use the existing file.
- Select the document Type (required).
- Note: Document Types can be added/edited in the Taxonomy area of GovHub.
- Select the Category (optional)
- Note: Categories can be added/edited in the Taxonomy area of GovHub.
- Enter a Description (optional).
- Enter Search Terms to help make this Document more find-able through search (optional).
- Associate the Document with a Program / Service (optional)
- Associate the Document with a Division / Section (optional)
- Edit the Publication Date (if needed) of the Document.
- Note: Publication Date is the field used when lists of documents are sorted by date.
- If you do not want your document to be returned by the internal site search, check the Exclude from Search box.
- Note: This box affects internal site search only; this box does not exclude the document from Google or other external search engines.
- Check the Published check box to make it available on the production site.Enter the Publication Date (if applicable) of the Document.
- Click on the Save button when finished.
This Document can now be referenced by its Name when embedding into content items.
Embed or Link to a Document
To add a Document while editing content:
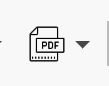
- Click on the Document button (the file image with 'PDF' on top) in the WYSIWYG menu.
- To simply link to a document, select Link to Document.
- Choose the Add Document link.
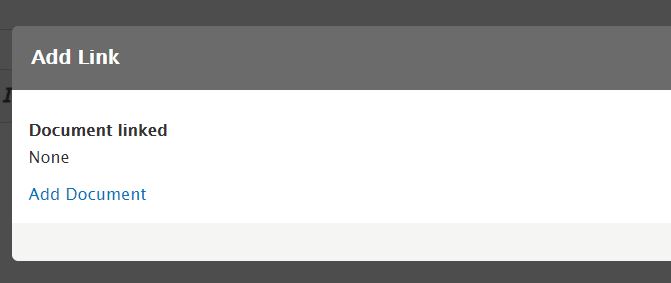
- If the document is already uploaded to the site, search the Document Library to select the document.
- Scroll down to click the blue Select button.
- Click Save.
- If you need to upload a document to the system, click on the Upload tab.
- Drag and drop the file from your computer.
- Fill in the fields --- all same as above except there are Categories here.
- Click Save.
- If the document is already uploaded to the site, search the Document Library to select the document.
- Choose the Add Document link.
- To treat the document in a card, standing out from other content, select Embed Document.
- If the document is already uploaded to the site, search the Document Library to select the document.
- Scroll down to click the blue Select button.
- Click Save.
- If you need to upload a document to the system, click on the Upload tab.
- Drag and drop the file from your computer.
- Fill in the fields --- all same as above except there are Categories here.
- Click Save.
- To simply link to a document, select Link to Document.
- Continue editing the rest of the content fields.
Administrative Document Library
- Click on Content.
- Select the Documents tab from the page menu.
- To locate a specific document, you can filter the list by:
- Name
- Type
- Category
- Description
- Author
- Published State
- Select an option from the Operations column of the Document to:
- Edit
- Move to Trash
- Clone
- Replace everywhere
Replacing a Document version globally
- Click on Content.
- Select the Documents tab from the page menu.
- To locate a specific document, you can filter the list by:
- Name
- Type
- Category
- Description
- Author
- Published State
- Select Replace everywhere from the Operations column of the Document.
- Click the Select Document button.
- Select the new file from the Document Library or Upload from your computer.
- Click the Select button.
Deleting a Document
- Click on Content.
- Select the Documents tab from the page menu.
- To locate a specific document, you can filter the list by:
- Name
- Type
- Category
- Description
- Author
- Published State
- Select Move to Trash from the Operations column of the Document.
- A confirmation page will give you the option to Move to Trash or to Cancel the delete request.
Publishing a Document
When a Document is embedded within a content item and the content item is published, the Document will also be published if it is currently unpublished.