![]()
| Table of Contents | ||||
|---|---|---|---|---|
|
All Webform Elements
| Page Tree | ||||||
|---|---|---|---|---|---|---|
|
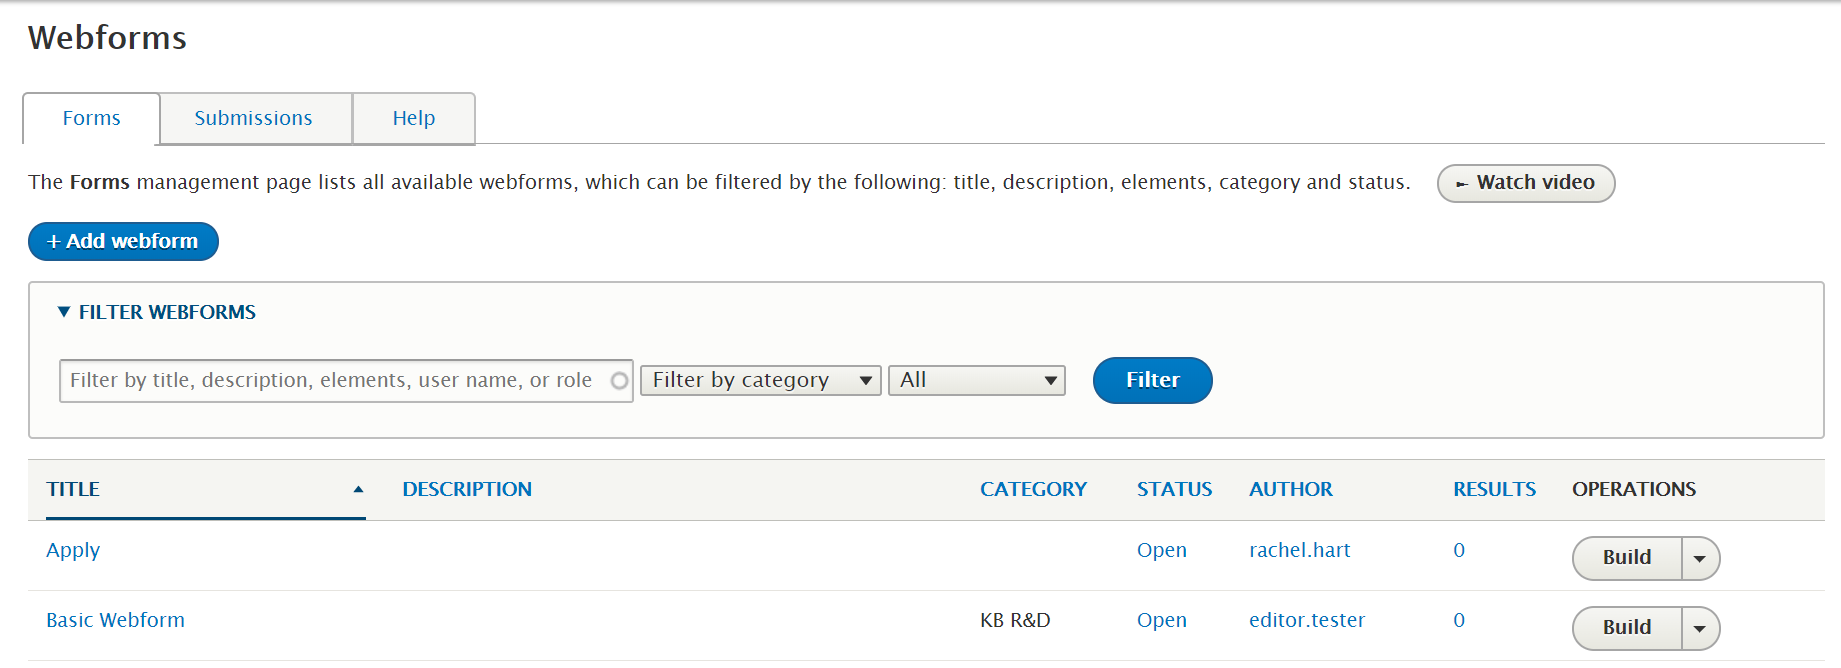
A Quick Tour of the Webform Interface
Adding and managing Webforms requires a two-step process:
- Create a webform.
- Click on Structure on the Administrative toolbar
- Click Webforms.
- After following the steps outlined on this page, be sure to reference the webform (Step #2 directly below).
- Reference the webform by creating a content item.
- Click on Content > Add Content.
- Click on Webform.
- Enter a Title and select the Webform.
Some of points of interest are:
- The tabs along the top are self-explanatory and we’ll look at these throughout the tutorials.
- You’ll see “Watch video” buttons in various places in the Webform module. These short videos are a great way to learn about Webform features.
- Add a new Webform.
- “Filter webforms” is useful if you have a large number of Webforms.
- An Operations button for each Webform allows you to build forms and view submissions.
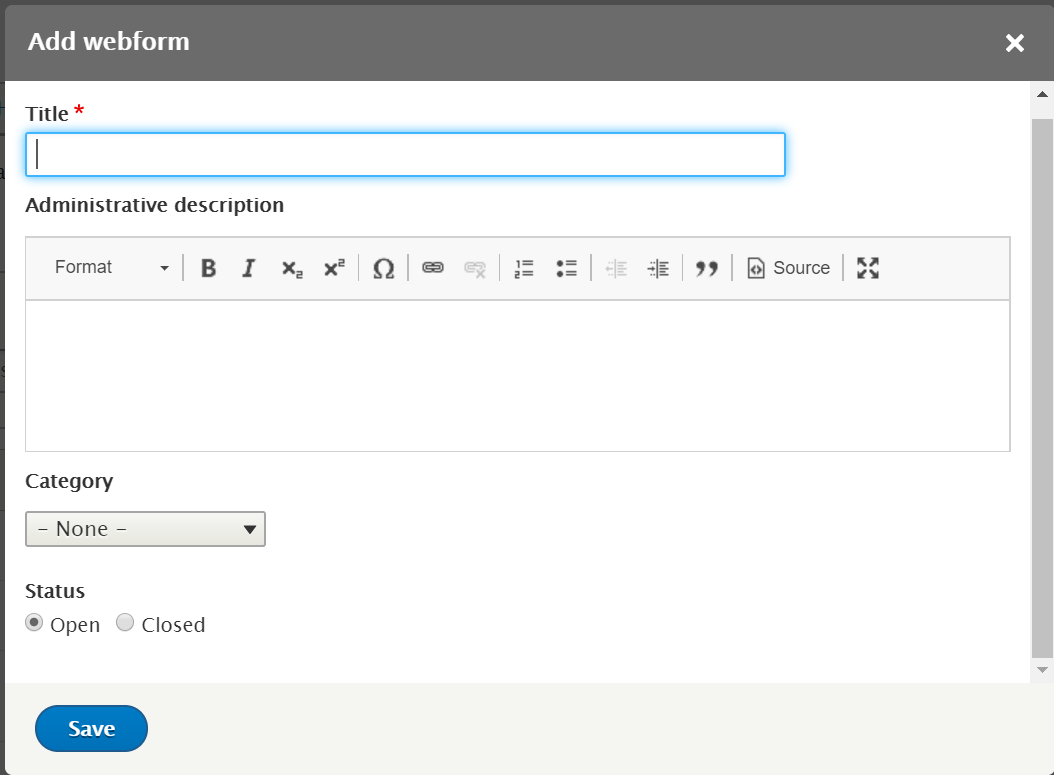
Creating a Simple Form
In this example, we’ll start off with a very simple newsletter signup form and then later we’ll add more complex elements. We’ll initially create two elements – first name and email address. One way to do this would be to duplicate the existing Contact form by clicking on the down arrow on the Operations button and then selecting Duplicate. We could then edit the form. The other way is to create the form from scratch and we’ll show you how to do that here.
- Click on the Add webform button.
- Enter a Title.
- Example: “Newsletter Sign-up" or some other appropriate description to fit the purpose of your form.
- Choose a Category (optional).
- If you plan to have a lot of forms then adding categories can be useful.
- We’ll add a Newsletter category by selecting the “Other…” option.
- Select the Status to be Open if you are ready to accept submissions. Otherwise, select Closed.
- Click Save to create the form.
1 - Creating a form.
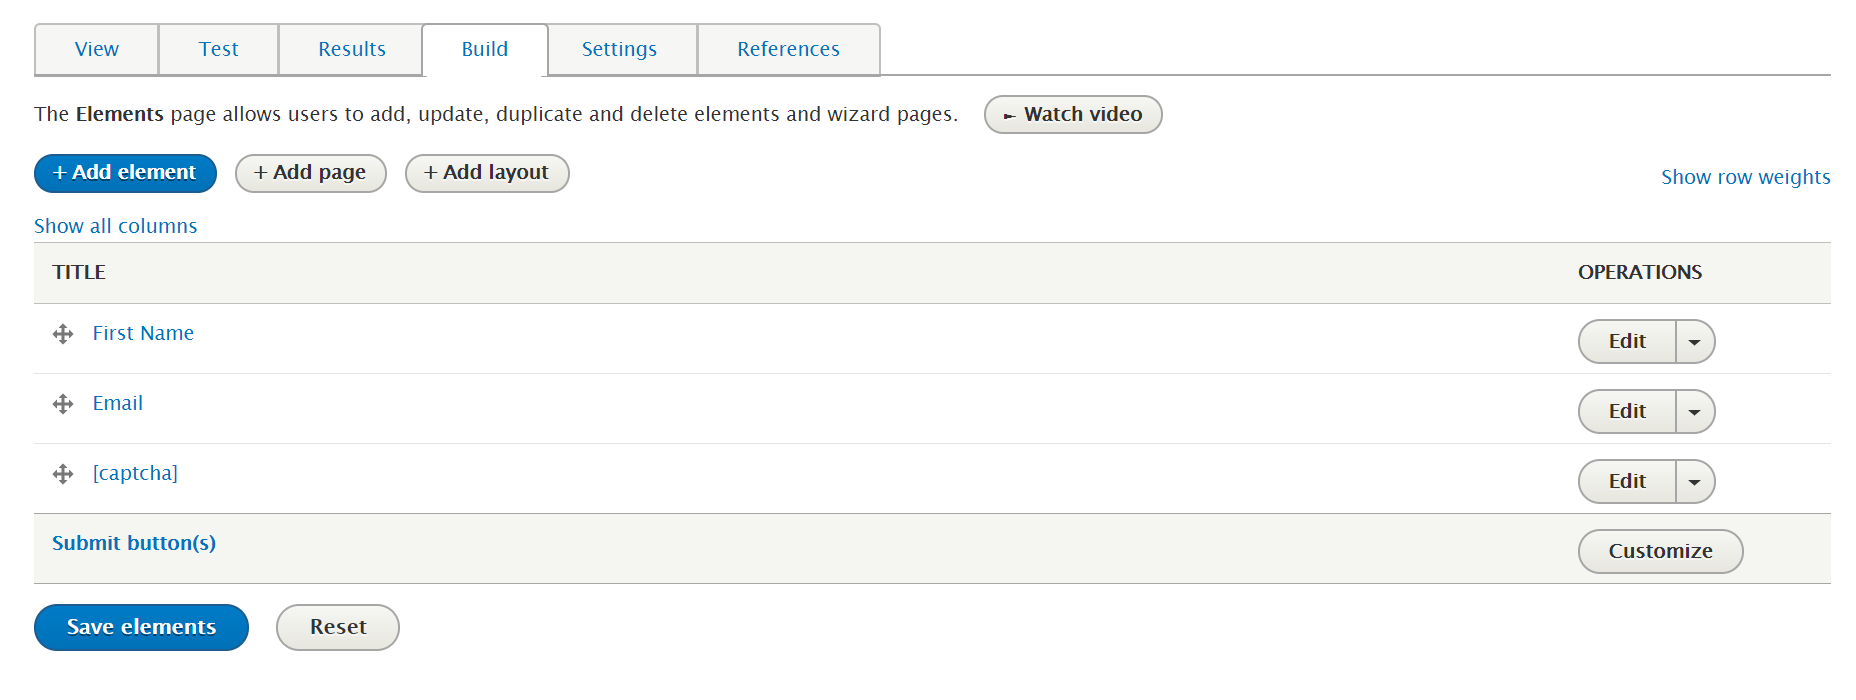
Adding Form Elements
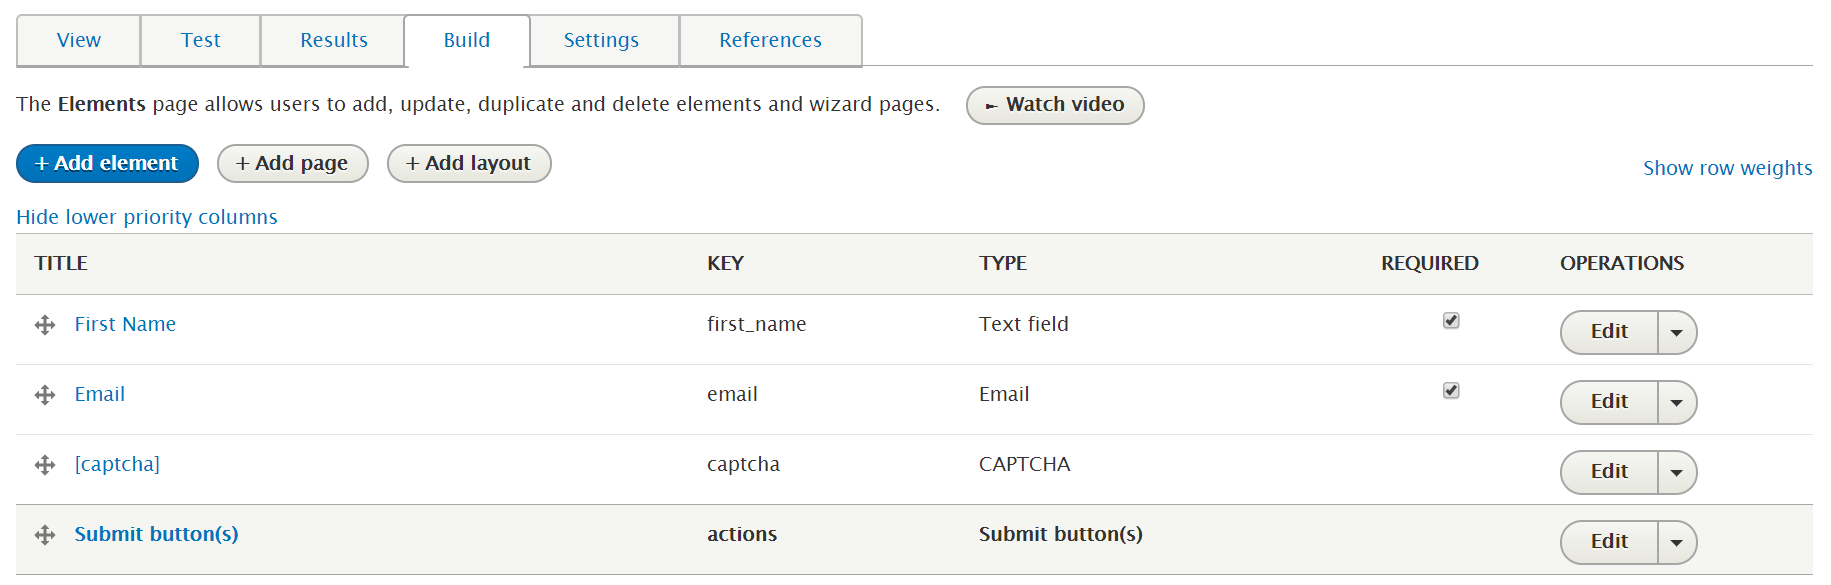
After saving, you will be redirected to the Build screen. Here, you can start adding elements to the form.
- The captcha element is automatically placed on your form.
- Click the Add element button.
- Use the Filter by element name box at the top to find "Text field”.
- Click on Add element next to that field.
2 - Add form elements.

Managing Form Fields
- Enter First Name for the field title.
- For this example, leave all the other settings as they are.
- Click Save to finish.
- Click Add element again.
- This time, find the Email field and click on Add element next to that field.
- Enter Email for the field title.
- Click Save.
3 - Webform fields.
Viewing the Form
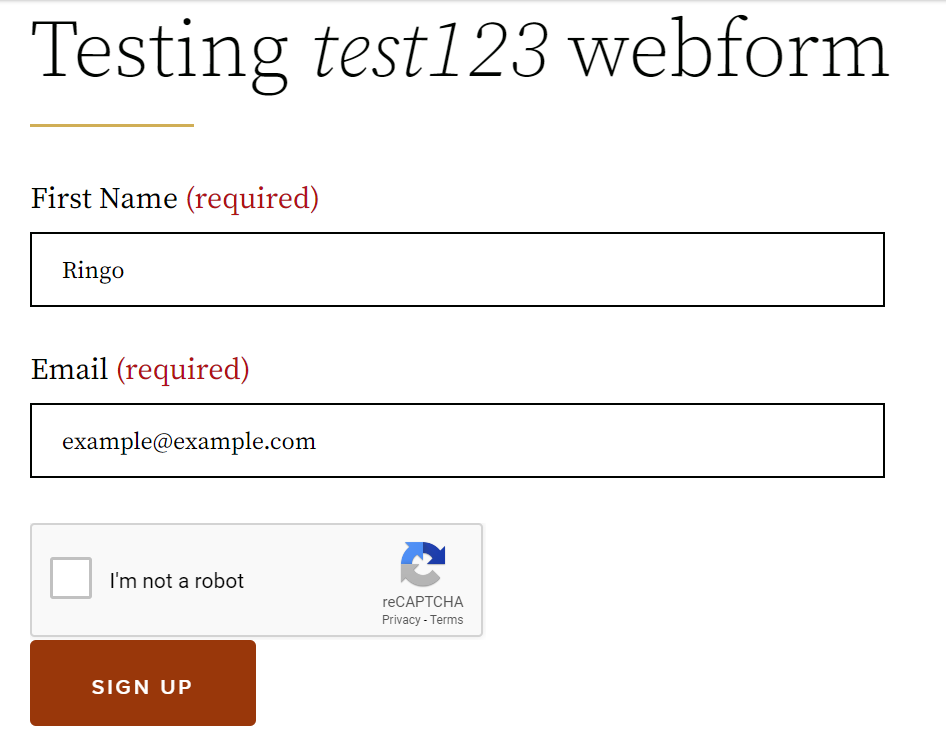
- Click on the View tab to see the form.
4 - Select the View tab.
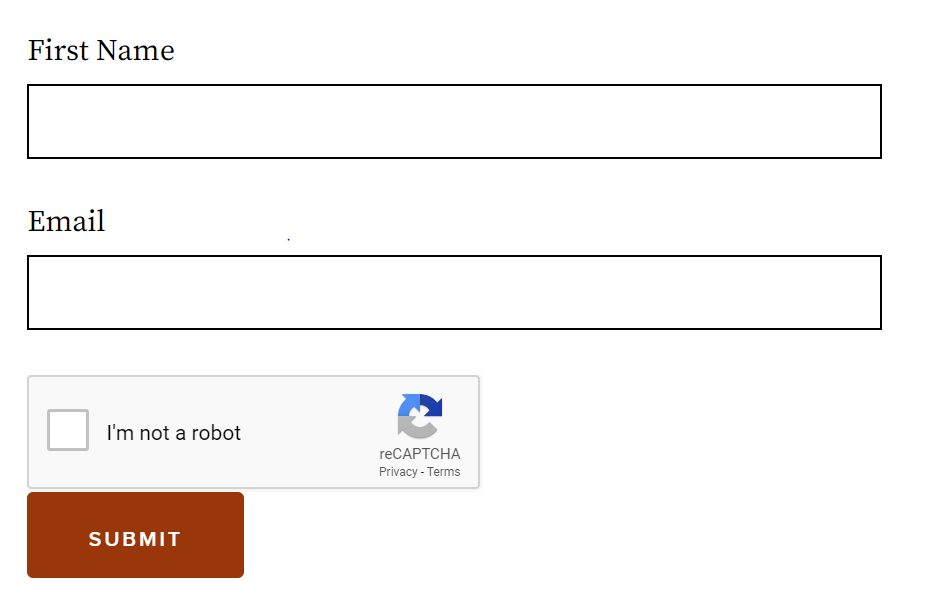
Customizing the Submit Button and Making Fields Required
There are several ways to customize each field, or you may choose to leave the default settings for the form.
- To change the Submit button text:
- Click the Edit tab.
- To the right of Submit button(s), click Customize.
- Enter Signup under “Submit button label”.
- Click Save.
- To make a field required:
- Select the checkbox under the Required column for both the First name and Email fields.
- Click Save elements.
Note: When using a customized submit button you can adjust the position of it relative to other elements.
5 - Customize the Submit button.

6 - Making a field required.
When you select the View tab, you will see that both fields are Required and the Submit button is labelled Signup.
7 - Required fields and customized button.

Testing the Form and Viewing Results
To test the form:
- Either manually fill out the form and Submit.
- You can also use the Test tab to generate data.
To generate multiple test results:
- Fill out the newsletter a few times
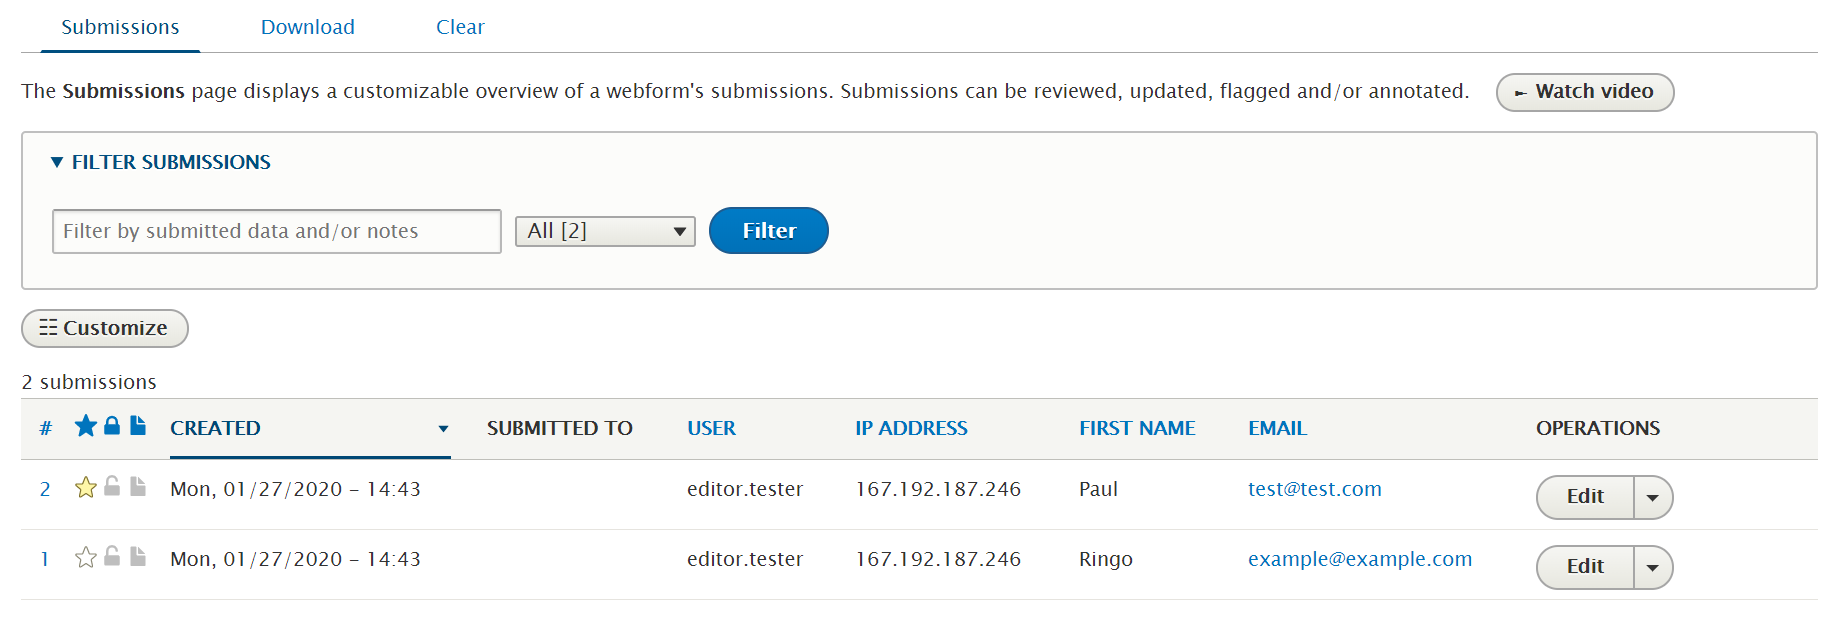
- Click on the Results tab.
- Click on the Customize button to change the columns shown if necessary.
- You can mark particular submissions with a Star or Lock or Add Administrative Notes.
- Select the Edit button next to each submission to Edit, View, Clone, Duplicate, or Delete submissions.
- The Download sub-tab allows you to export the submissions in a variety of ways.
- You can filter based on date or submission ID, so you don’t need to download all the data at once if it's not necessary.
Testing the Form
Viewing the Results
Emailing Results
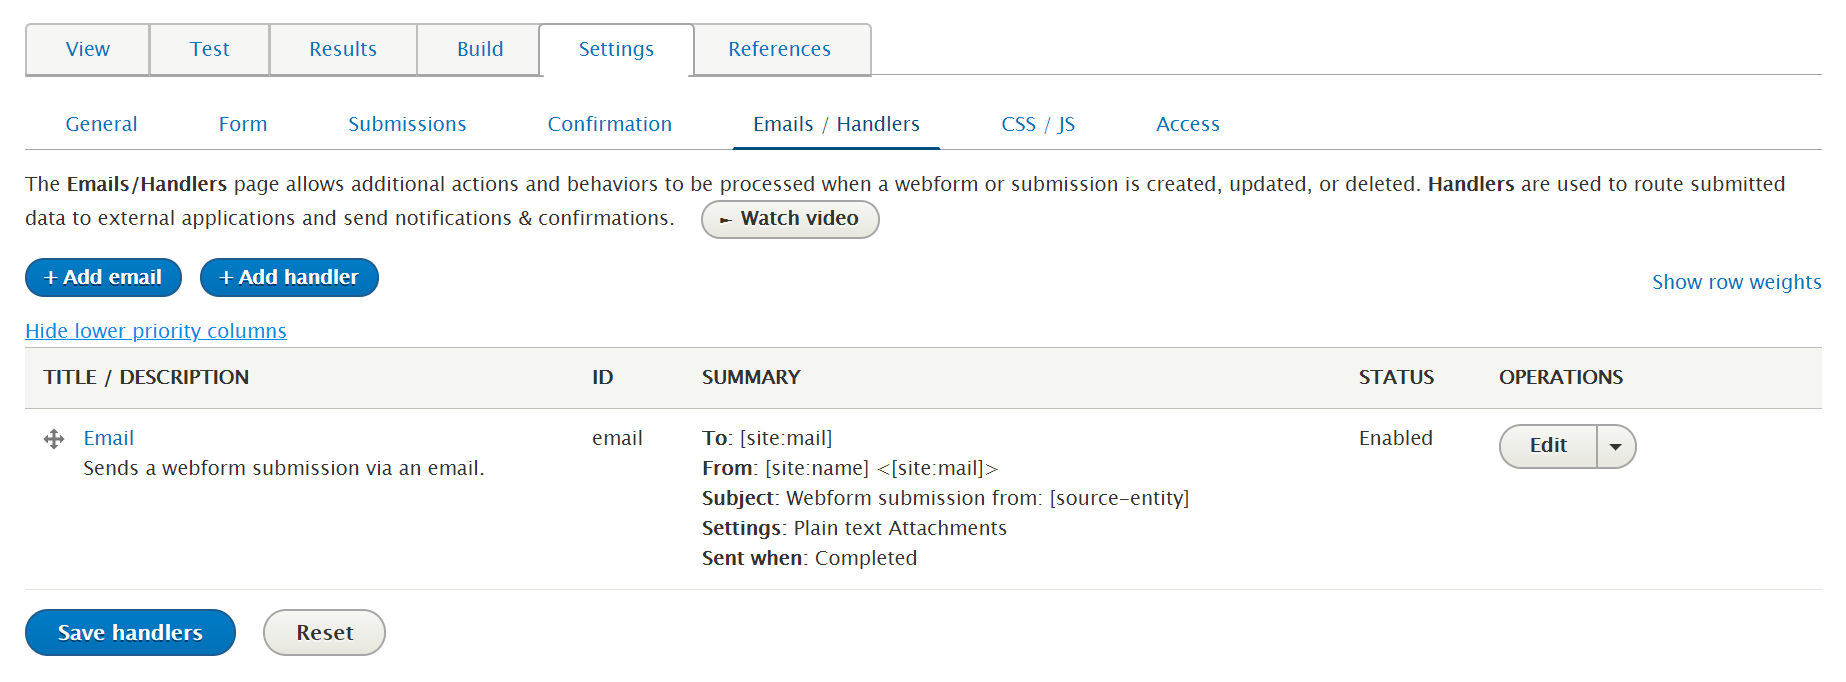
While the Results tab allows you to review submissions, it can also be useful for results to be emailed once submitted.
- Select the Settings tab at the top of the webform.
- Click on the Emails / Handlers sub-tab.
- Select Add email.
- In the Send to section, enter the email address of the person (or mailbox) that will receive the results. In the Send from section, use the default settings for now. This will use the email address and name that are configured for the site (administrative toolbar – Configuration, “Basic site settings”).
- The email that’s sent can be customized in the Message section if required but we’ll just stick with the default message.
- Click Save to create the email handler.
Related articles
| Filter by label (Content by label) | ||||||||||||||||||
|---|---|---|---|---|---|---|---|---|---|---|---|---|---|---|---|---|---|---|
|
| Page Properties | ||
|---|---|---|
| ||
|