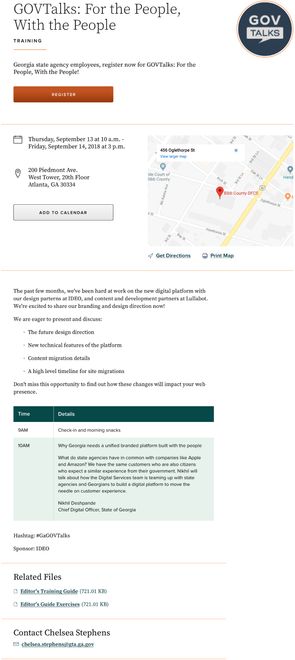
When to use an Event
Use an Event when you want to share details about an activity that site users can attend, or should be aware of. Use the Event Content Type as a hub of all information related to your event including links to registrations, attachments like agendas or presentations, and a recap after your event. Events allow for categorization so that you can create lists of related events, like board meetings or conferences.

How this interacts with other system components
| Interaction | System Component |
|---|---|
| The creation form for this content type contains an entity reference for the following content types | Location |
| This content type can be embedded in the following places | News, Topic Page |
| This content type can be involved in the following Taxonomies | Program/Service Organizational Stream/Division Search Terms |
Automatic Views
There are two automatic views that are generated by the Drupal system whenever at the first Event is published: Upcoming Events and Past Events.
Upcoming Events can be viewed at "[your agency URL]/events" Example: https://digitalservices.georgia.gov/events
Past Events can be viewed at "[your agency URL]/past-events" Example: https://digitalservices.georgia.gov/past-events
Event recap
This is a new field for the Event content type. The purpose of this field is to provide any information to your audience that would be useful after an event has occurred.
Things to consider including in an event recap:
- Meeting Notes
- Event Recordings
- Presentation Slides
- Take-home documents or Hand-outs.
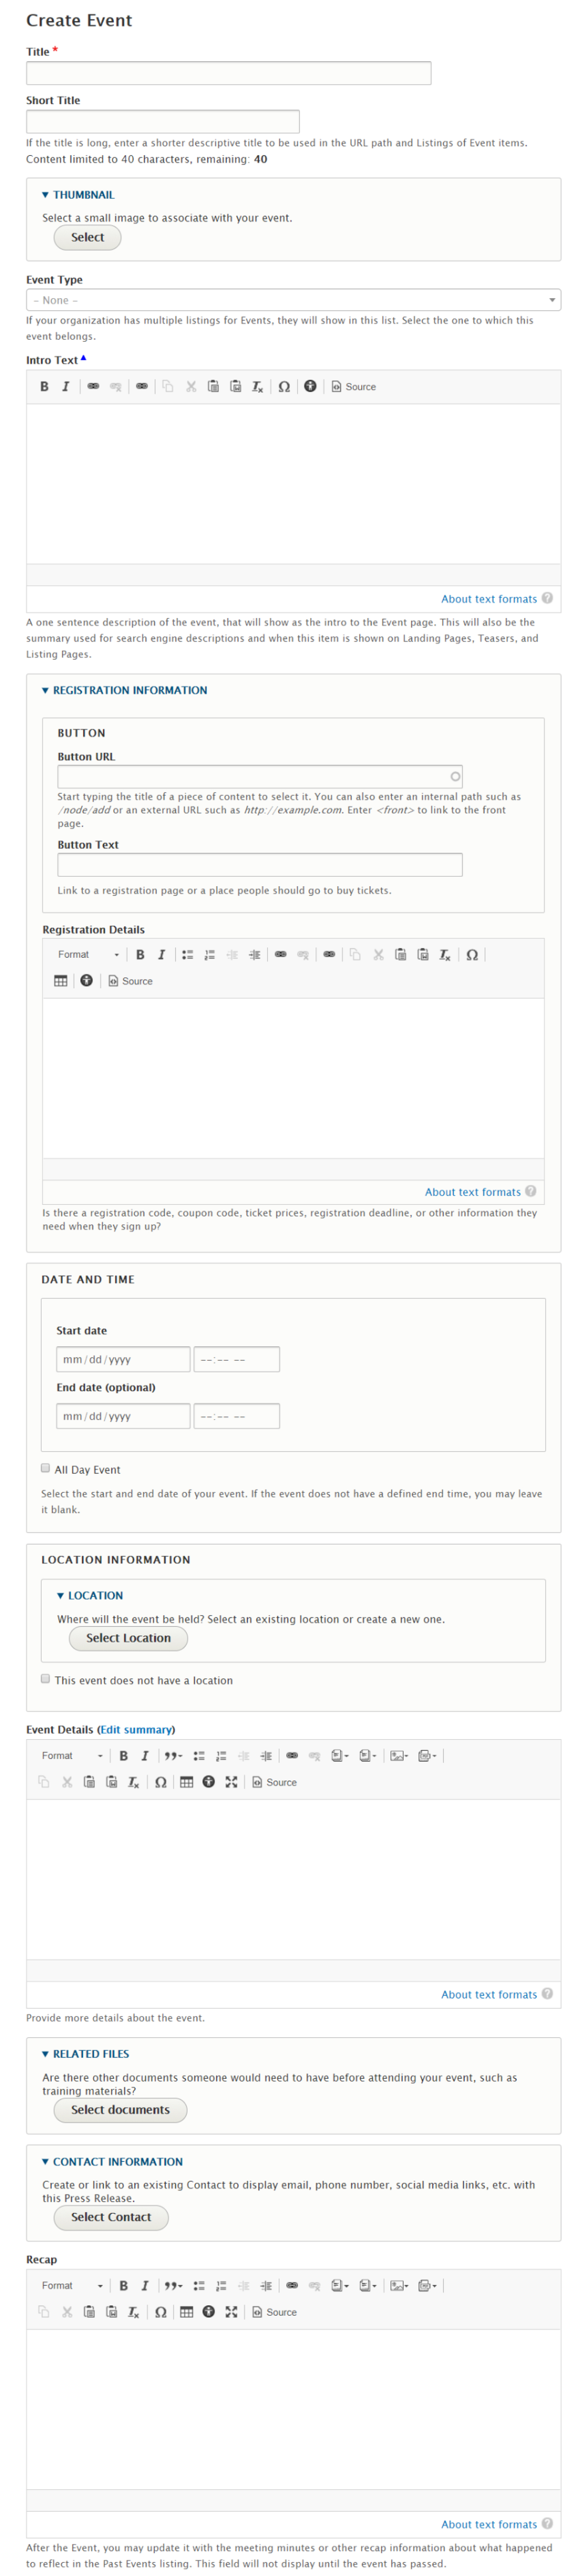
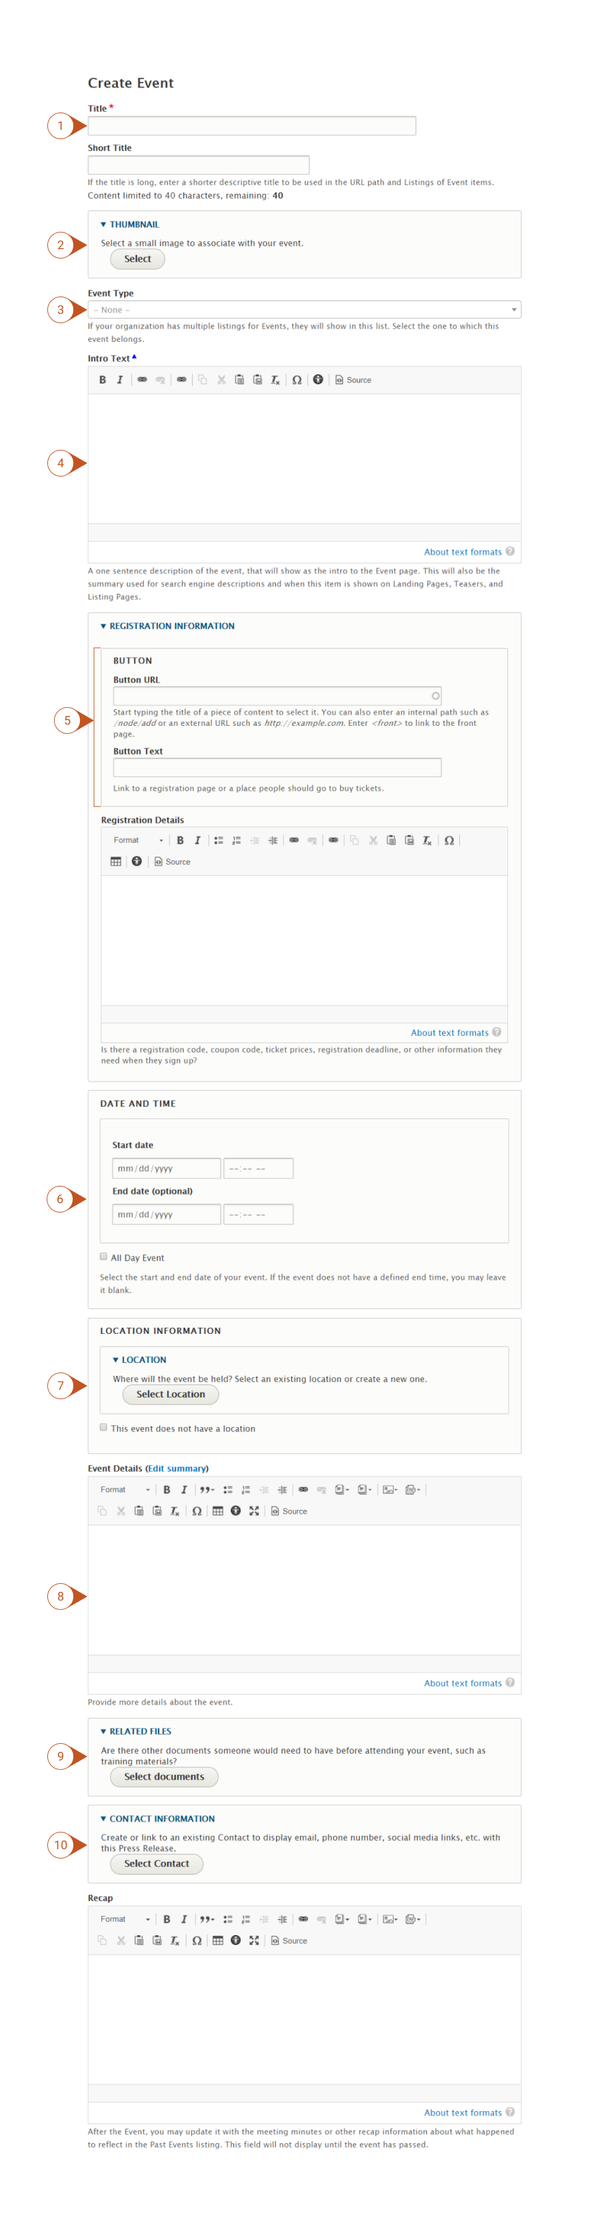
How to Create an Event
- Log into your agency website.
- Click on Add Content.
- Select Event.
- Add Title (required).
- The Title appears at the top of the page, and is also used in URLs and anywhere the page is linked to from other content across the site.
- Add Short Title (optional).
- The Short Title, if used, will replace the title in URLs and anywhere the page is linked to from other content across the site.
- Note: The Short Title will NOT replace the Title at the top of the page.
- The Short Title, if used, will replace the title in URLs and anywhere the page is linked to from other content across the site.
- Add a Thumbnail if your event has a logo or associated image (optional).
- If the image is already in your site library, search for it in the window.
- To upload a new image, select the Upload Image tab at the top of the window.
- Select the image from your computer or drag it into the File Upload screen.
- Enter required image metadata and Click Save.
- Select an Event Type (optional) from the drop down menu if you’d like to categorize your event.
- This may be used to create lists of similar events, like Board Meetings, etc.
- Note: To edit the list of Event Types, please see the Taxonomy Management section of training.
- This may be used to create lists of similar events, like Board Meetings, etc.
- Enter Intro Text (required) to be displayed at the top of your event page.
- This text will also be used as a short description of the event in lists.
- Add Registration Information (optional).
- Add an Event Link - Enter the website URL where users may register or learn more about the event.
- Add Button Text - This is the text that should appear on the button.
- Include additional Registration Details (optional) – You may enter text with more event details. For example, you may include information about pricing, coupon codes, or room or floor information.
- Enter a Date and Time for your Event, or select All Day Event (one or the other is required)
- For an All Day Event, Start Date is required.
- Associate a Location to you event (required).
- Click the Add Location button.
- Select either an existing Location or enter a new one using the Select Location button.
- If your event does not have a physical location (webinars, etc.) select the checkbox “This event does not have a location”.
- Add Event Details (optional).
- This field is used to expand on the event’s purpose, requirements, or any related information.
- Attach Related Files (optional) if you would like to provide supporting documents with your event (like agendas, presentations).
- Use the Add Related File button to browse for an already-uploaded document or to upload a new one.
- Use the Add Contact button (optional) to provide Contact Information by selecting an existing contact, or creating a new one.
- The Recap Field (optional) can be used to enter meeting notes, summaries or follow-up information.
- In the Associate this Content with box…
- Associate the Event by Selecting (optional):
- Program or Service References
- Division / Section
- Categories
- Learn ,ore more about how to use Taxonomies to associate this content.
- Associate the Event by Selecting (optional):
Publish, Save as Draft, or Schedule Publishing for your Event (see Publishing instructions for more information).
Past Events
After an event date has passed, the event will be removed from any lists of upcoming events. Users may find the event in the link to Past Events that appears in event lists.
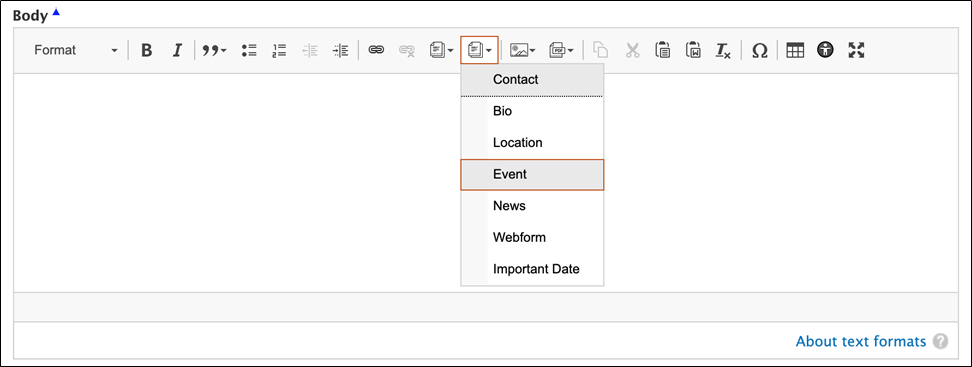
Embed an Event in a News Page
Event information can be embedded into other pages on the website, like Topic Pages or News Pages. When embedded, a “teaser” of the Event will display on the page and will link to the full Event Display Page.
- To embed an Event into a News Page, you would first:
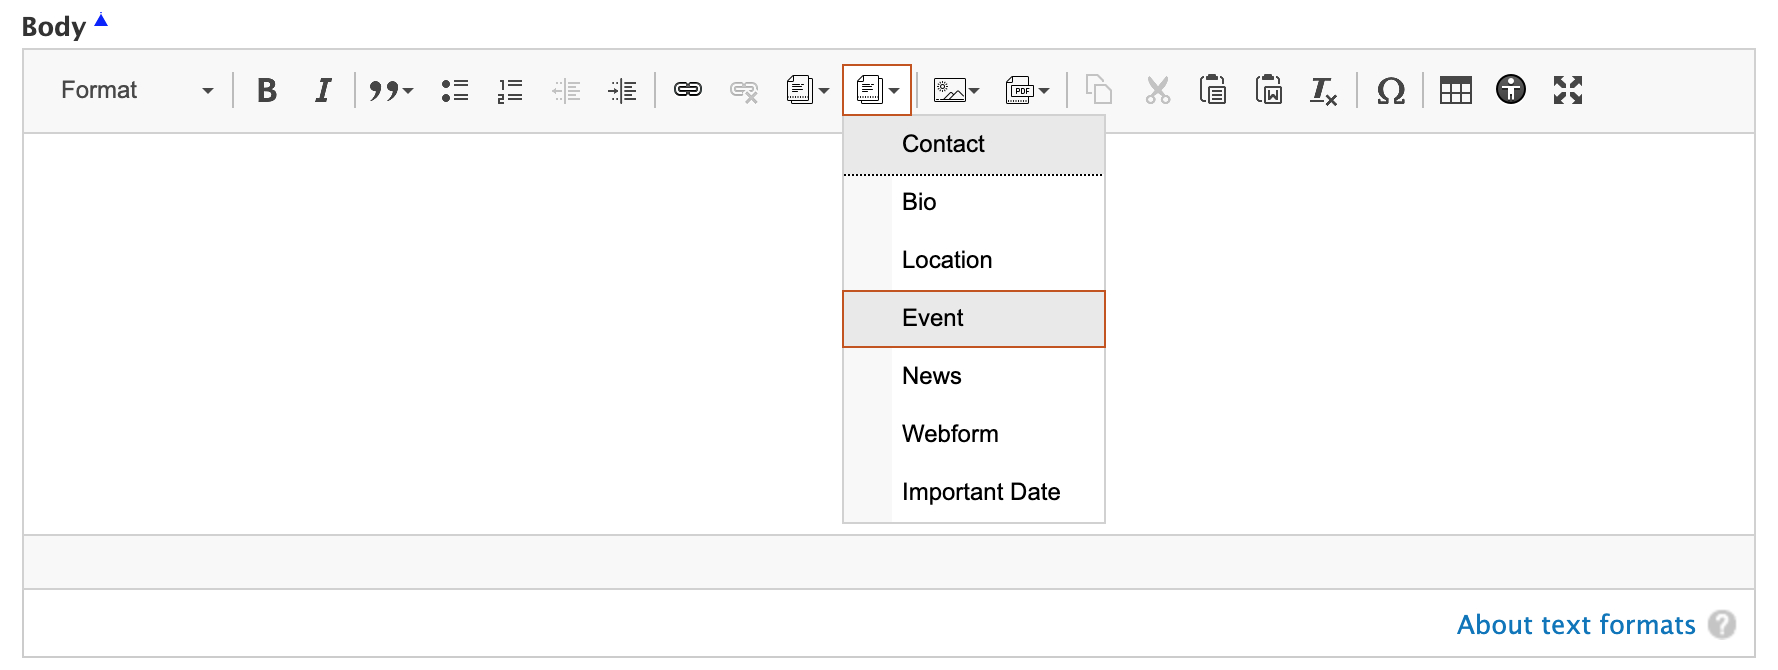
- Click on Embed Content on the WYSIWIG Editor tool bar in the Body section of the Create News admin page.
- From the drop down list, click on Event.
- Click on Embed Content on the WYSIWIG Editor tool bar in the Body section of the Create News admin page.
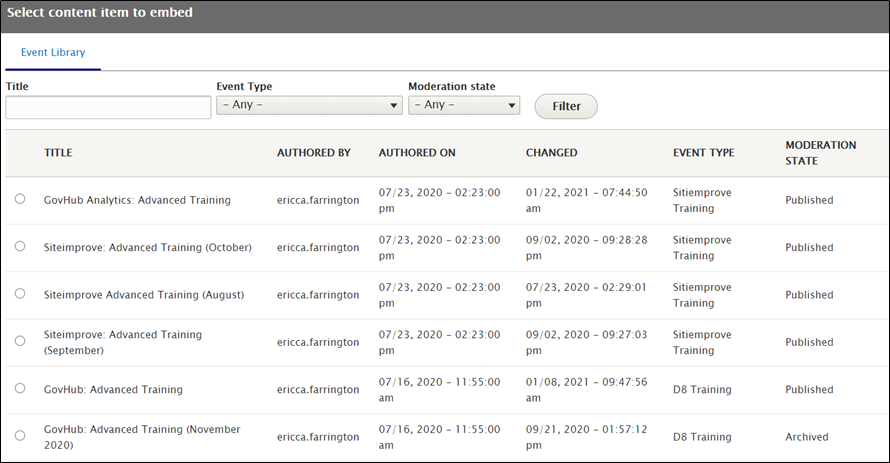
- Next, you will then have the option to select a content item from the Event Library to embed. To identify/select a content item for embed, you can either:
- Drill down to a specific content item, filter your search by inputting the Title, selecting Event Type and Moderation Type, followed by selecting filter.
- Scroll down below the filter option and click on the specific content item to embed from the Event Library, then click on the select button at the bottom of the page.
- The option to customize the embed item will be presented, whereby you can:
- Select an Icon to be shown with with the embedded event.
- Specify how the embedded event is to be aligned on the News Page.

- To complete, click Embed.
Removing an Event
To remove an Event from the site, either Unpublish the event, or move it to the Trash.
Past events will automatically be removed from lists of upcoming events, and will be accessible via the Past Events link at the bottom of lists.
Event Display