When to Use a Location
Use this content type for physical locations where the public can interact with your agency, receive services, or participate in public events.
How this interacts with other system components
| Interaction | System Component |
| The creation form for this content type contains an entity reference for the following content types | Contact |
| This content type can be embedded in the following places | Event Organization |
| This content type can be involved in the following Taxonomies | Location Type Areas Served Program/Service Division/Section |
Misuse
Do not use Locations to provide information about how to call or email a brick and mortar location; use the Contact Content Type for that.
How to Create a Location
- Log into your agency website.
- Click on Add Content.
- Select Location.
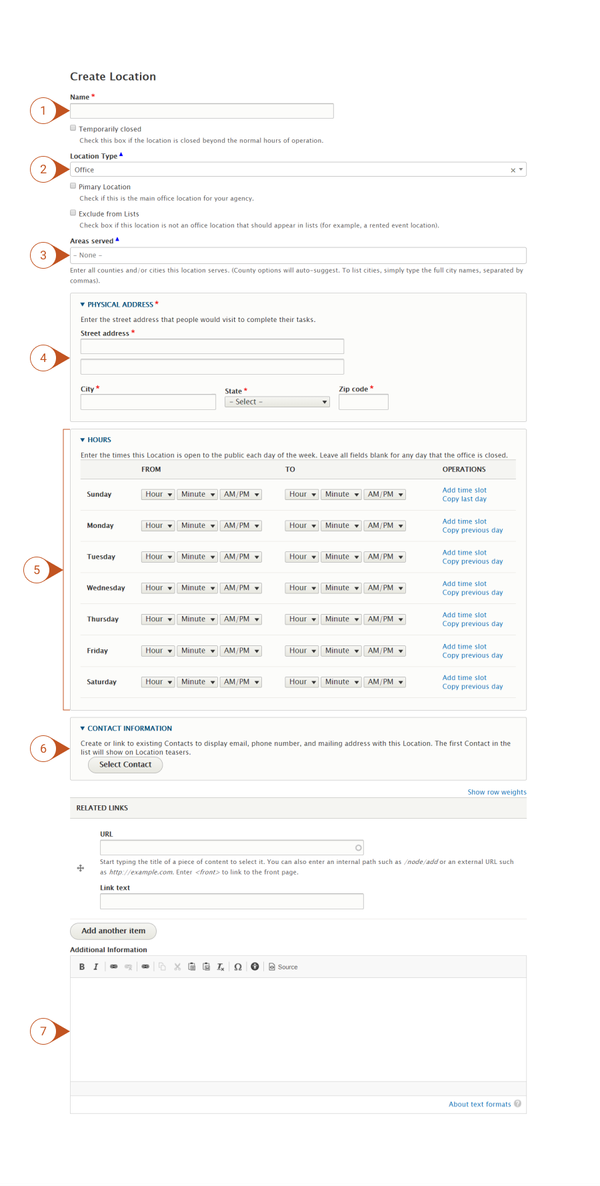
- Add a Name (required).
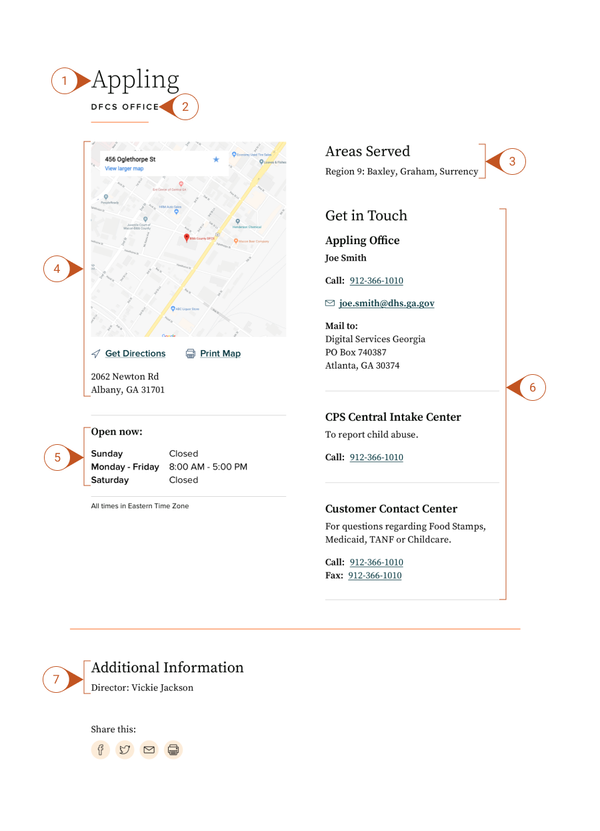
- The Name appears at the top of the page, and is also used in URLs and anywhere the page is linked to from other content across the site.
- Temporarily Closed (optional).
- Check this box if the Location is closed during normal operating hours. An alert will display at the top of the page.
- Select a Location Type (optional).
- Select from Event Location, Office or search for locations across the site. (See Taxonomy training.)
- Add Areas Served (optional).
- Enter the counties or cities that this Location serves. The field will auto-suggest Location names.
- Add Notes (optional).
- Text in this field will appear above the map on the page.
- Add the Physical Address (required).
- Enter the physical address to generate the interactive map that will display on the page, included the Street address, City, State and Zip Code.
- Add Location Hours (optional).
- Enter the opening and closing hours. If hours are similar across several days, you can copy the previous day’s hours. Leave the hours blank for days the Location is closed.
- Add Contact Information for the Location (optional)
- Select or create a new Contact to include the phone number or email address for the location.
- Add Related Links (optional).
- Add links to internal or external URLs that can supplement the Services Offered section.
- Include any Additional Information (optional).
- Use this field to describe any other details about the Location. Use the WYSIWYG editor to format content as needed. Further, you may embed various other content from across the site into the body of the Location. Content which can be embedded into a Location includes:
- Media:
- Images
- Links to documents or files
- Links to other web pages
- Micro-Content:
- Accordions
- Call to Actions
- Promos
- Media:
- In the Associate this Content with box…
- Associate the Important Date by Selecting (optional):
- Program or Service References
- Division / Section
- Learn more about how to use Taxonomies to associate content
- Publish, Save as Draft, Archive, or Schedule Publishing for your Location (see Publishing instructions for more information).
- Use this field to describe any other details about the Location. Use the WYSIWYG editor to format content as needed. Further, you may embed various other content from across the site into the body of the Location. Content which can be embedded into a Location includes:
Embed a Location
Use an Existing Location in WYSIWYG
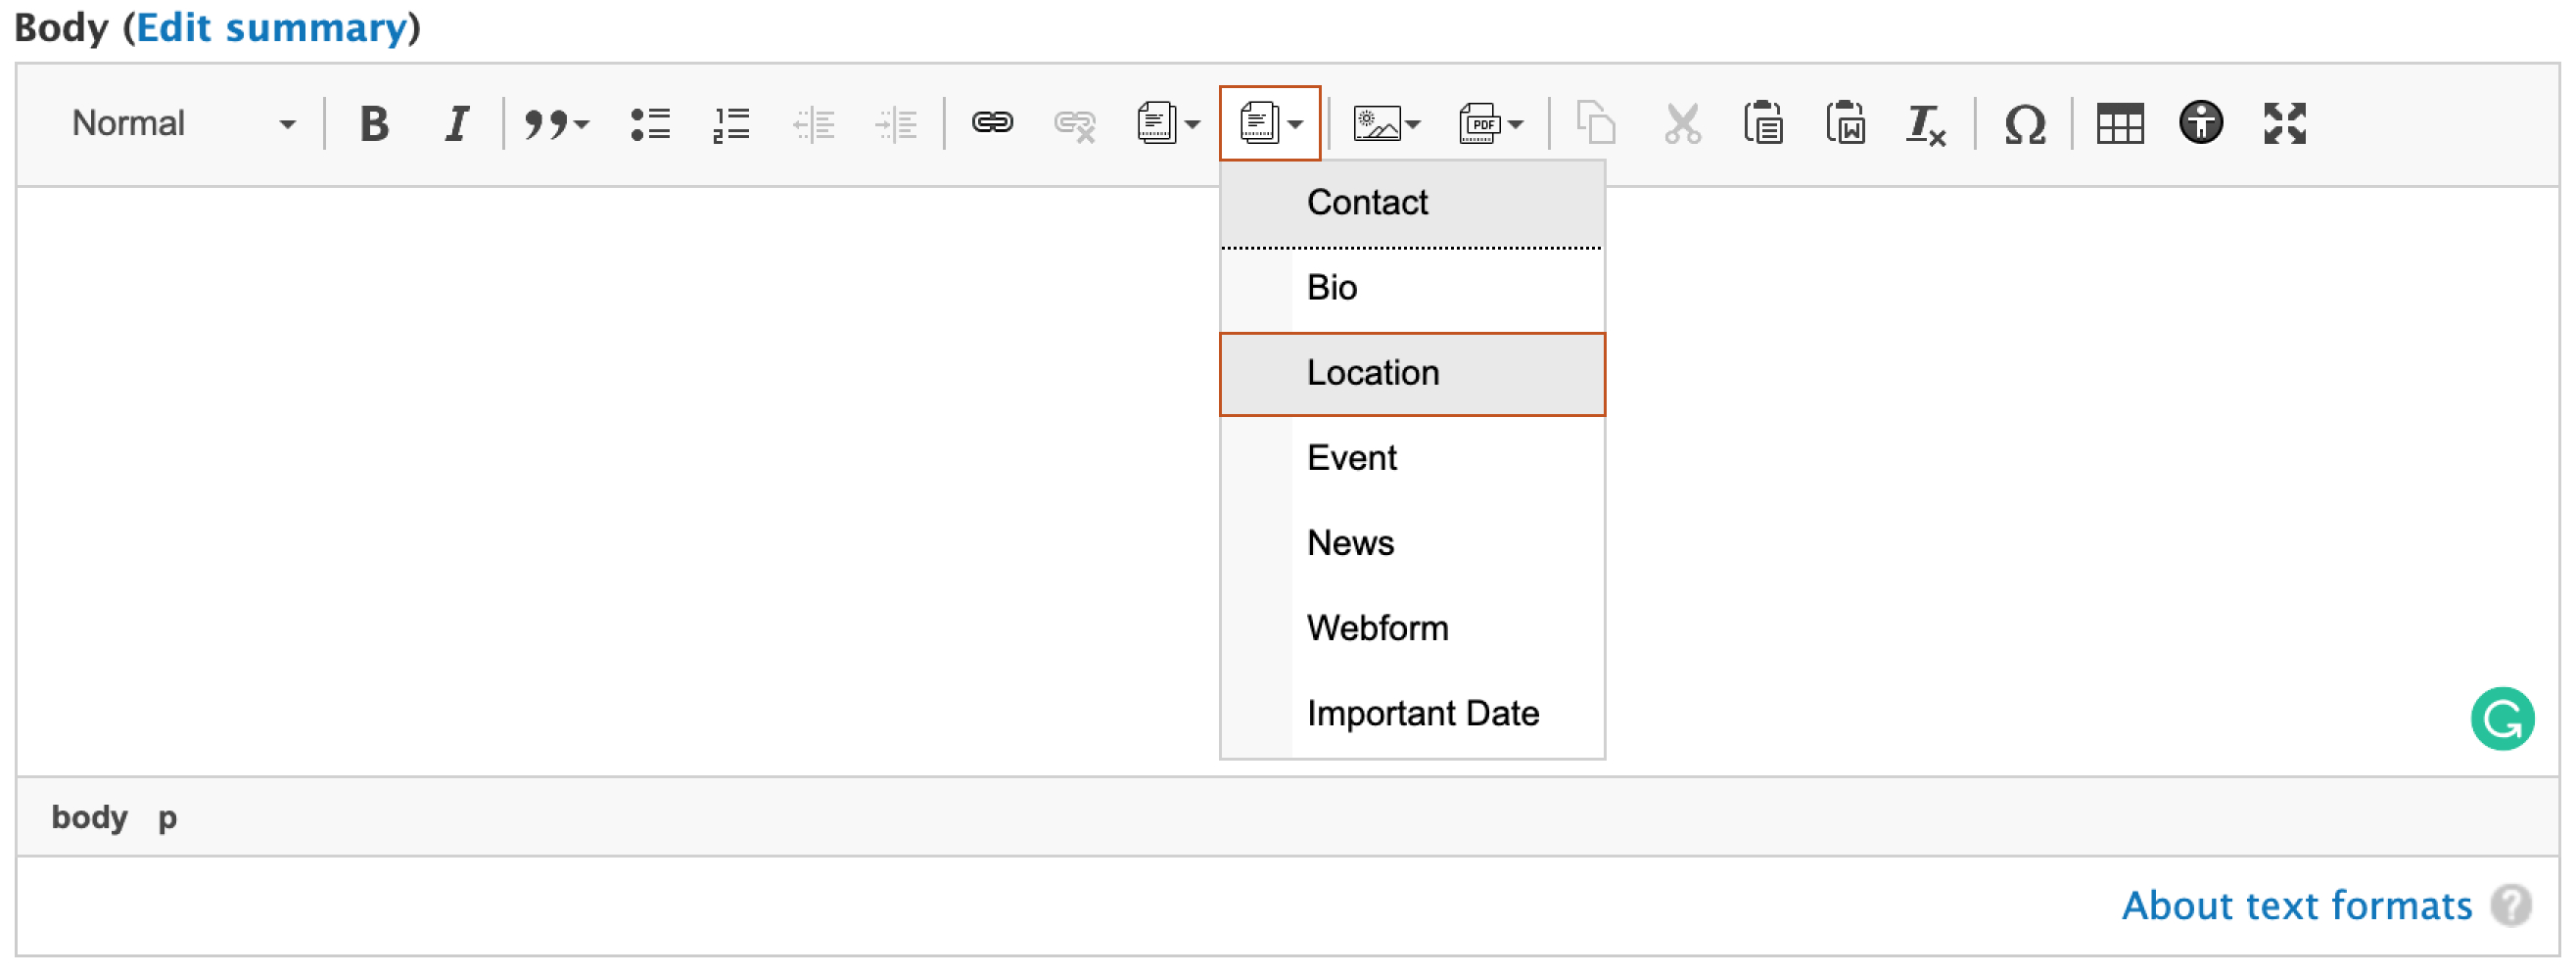
- Place your cursor at the spot where you would like the Location to display.
- Click on the Embed Node button.
- In the pop-up window, search for the existing Location by typing in the Title field and clicking the Apply button.
- Click on the content item in the search results. A check mark will indicate the content item is selected.
- Click on the Select button at the bottom of the pop-up window.
- Select how the Location should appear by choosing from the drop-down list.
- Check the Card button if you would like a box to appear around the Location.
- Click the Embed button.
- The Location will display in the WYSIWYG.
Remove a Location
To remove a location from your site, either Unpublish the Location, or move it to the Trash.