Landing Pages should be content hubs for large sections of your site.
...
Once we understand your needs, we will determine what, if any, cost will be necessary for planning and building the Landing Pages. Please open a support request to start the conversation.How to Create
Landing Page Best Practices
- Landing Pages are not intended to house content but rather to easily connect users to related content, acting as the starting point for sections of information. Consider Landing Pages a “hub” of related content.
- Landing Pages work well as the starting point for sections of information. They are typically high in the site navigation, have only short blurbs of text, and lots of links. Landing Pages give you control over the layout with stackable sections.
- Landing Pages function significantly differently from other D8 content types.
Creating the Landing Page Container
- Log into your agency website.
- Click on Add Content.
- Select Landing Page.
- Add Title (required).
- The Title is required so that the Landing Page can be found in the back-end of the system.
- It will not appear on the Landing Page itself.
- Add Short Title (optional).
- The Short Title will replace the title in URLs, navigation, and anywhere the page is linked to from other content across the site.
- Select the Include Navigation? checkbox if you want the Landing Page to display with the side navigation visible (optional).
- Add a Label (optional).
- This will only display in very specific circumstances and in most cases can be skipped.
- Add Summary (optional).
- Add a short statement to summarize the page’s content or purpose. In most cases, this will not show on the page itself but will be used in any links to the page that are configured to include a description.
- In the Associate this Content with box…
- Associate the Landing Page by Selecting (optional):
- Program or Service References
- Division / Section
- Categories
- Associate the Landing Page by Selecting (optional):
- For the moment, leave the moderation state to Save as: Draft.
- Until you complete the next phase – Adding Layout and Content – the page will appear empty.
- Click Save.
...
You can customize the layout of your Landing Page by stacking Sections of various layouts. Then add Blocks of content to each section.
The Layout initially provides one default section which you do not have to use. Since there is no way to change the layout of a section, once created, click the X next to the Configure Section link if you don't want to use it.
Add a Section
- Click + Add Section link in the middle of your screen.
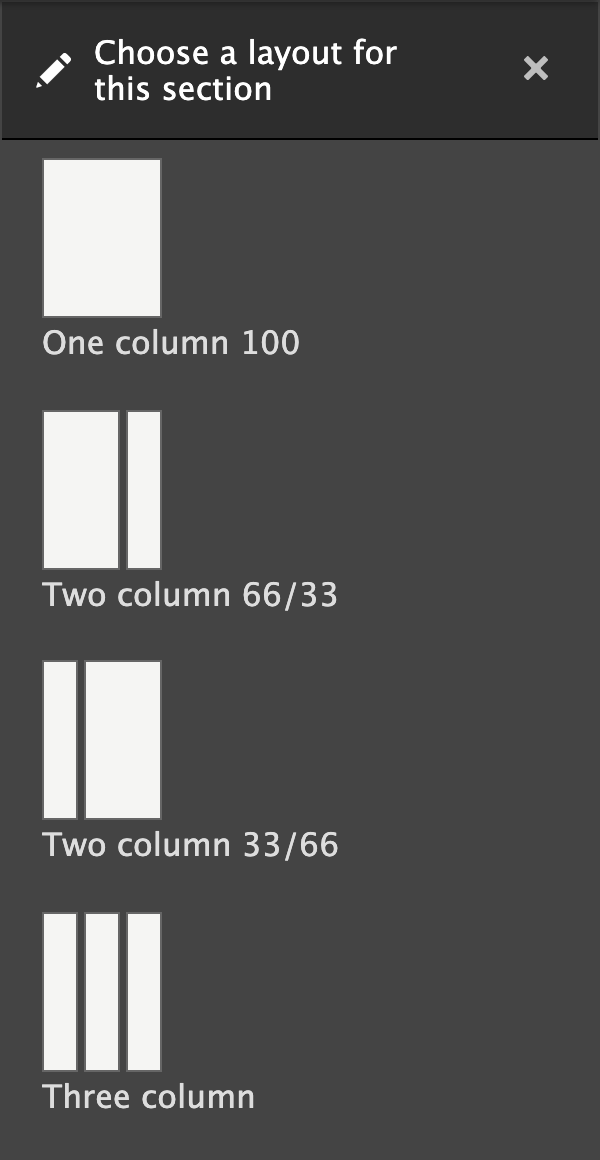
- Select which layout you need for this section:
- One full-width column
- Two columns, with a 2/3-width region on the left and a 1/3-width region on the right
- Two columns, with a 1/3-width region on the left and a 2/3-width region on the right
- Three equally-sized columns
- Enter a Section title (optional).
- This title will display at the top of the section, so leave this blank if the section doesn't need a title.
- Select a Background color (optional).
- Use the drop-down selector to see what colors are available in your palette.
- The lightest background color in every palette is White.
- You can also remove the background color with the X on the right side of the selector.
- This is, in effect, the same as selecting White as the background color.
- If the Landing Page includes side navigation, all sections should have a White or no background color.
- If the Section uses the layout with one full-width column, you can choose to show a Background image (optional).
- Select an image from the system library.
- Click Add section.
- To edit the section title or background, click Configure Section to return to the options.
Add Content to a Section
- Click + Add Block in the area you want to add the content.
- Use the menu on right side to select the content you want to add. Block options are categorized by Micro-content and Content:
- Micro-content is content created specifically to be embedded as a block on another page. Learn about Micro-Content Types
- Content is content that exists on a page of its own. When embedded on the Landing Page, it will display as a type-specific teaser.
- For help understanding each content type or deciding which is most appropriate for your needs, refer to training on those content types.
- To rearrange content, drag and drop the content block into different sections and regions in the layout.
...