Webforms make data collection simple because you are also able to export your collected data into an Excel spreadsheet or CSV for further analysis.
Webforms can send results directly to a custom relationship management tool (CRM) for more complex analysis and secure data transfer. If you’re doing some additional processing in another system, then you can use this to automate data entry rather than getting form results in an email and entering it manually.
And making this a little bit more sophisticated, you can also send the results from your GovHub Webform directly to a customer relationship management tool for more complex analysis and secure data transfer. So, think of this as an alternative to an email notification. If you're doing some additional processing in another system, then you can use this to automate entering that data, rather than needing to get the form results in an email and then entering that manually.
Email Messages
Consider the submission process. If someone at your agency is the best person to answer questions about a particular topic, form submissions dealing with that particular topic should go to them. Also, think about how you’re planning to respond to these submissions. Make sure you’re asking for the correct kind of contact information!
While the Results tab allows you to review submissions, it can also be useful for results to be emailed once submitted.
To add an email to receive webform responses:
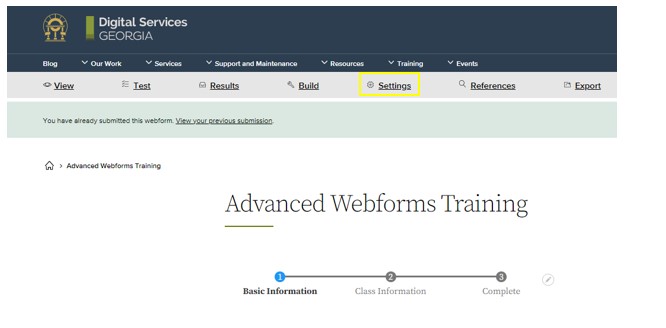
Click on Settings from the toolbar.
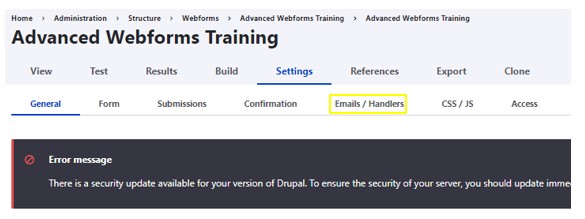
Next, click on Emails/Handlers.
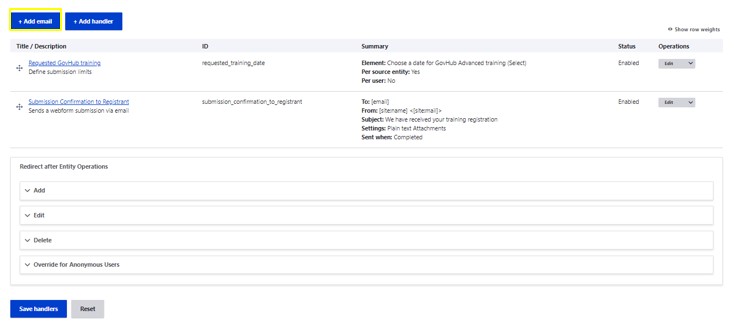
Click on Add email.
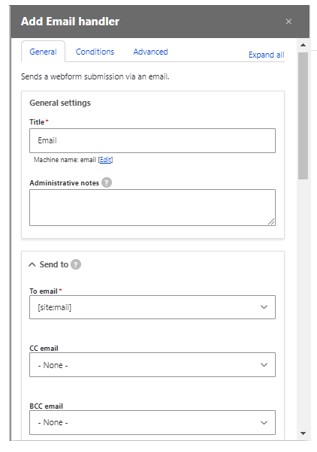
From the Add Email Handler window that you will see open on the right side of the page, under general settings tab, input the following:
General Settings:
Title. Note: This is the title for the new email address.
Administrative notes (optional). Note: Entered text will be displayed on the handlers administrative page and replace the handler’s default description.
Sent to:
To email. Note: This is the person(s) responsible for receiving the webform.
Enter a Carbon Copy or CC email (optional).
Enter a Blind Carbon Copy or BCC email (optional).
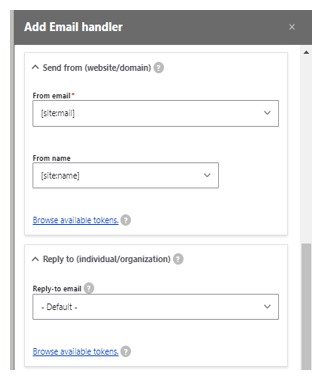
Send from (website/domain):
Input a From email address. Note: The from email address should be from you. It should be your brand, company, organization or website entity. Click the down arrow to select from the list. The ame applies for the From name.
Input a From name.
Reply to (individual/organization):
Input a Reply-to-email. Note: This email address is the email address a recipient will see when replying to an email. Leave blank to automatically use the from address.
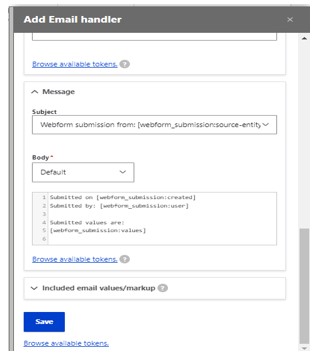
Message:
Select Subject. Note: Click the down arrow for the list of options.
Select Body (required). Note: Click on the down arrow to select body type from the list of options.
Finally, click Save.
Visual Instructional Steps:
Conditional Email Messages
In D8, you can send custom email responses to users based on what's been entered. For example, you can send a custom message only to people with a government email address. In the past, content managers have had to rely on third-party tools for this functionality.
Form Results Access
Limiting who can see the results of your Webforms has gotten more granular in D8. Previously, you could only limit who had access to the Webform results page. Now, you can limit access to the results of individual fields as well.
We hope you’re as excited about these advancements and updates to your website as we are. This is only a small portion of the new features available. If you are interested in learning more, submit a Support ticket and find out about what you can do on GovHub.