How to Create an Accordion
Accordions are intended to be used within the context of a page's WYSIWYG. You can create the accordion content from the page you are editing. Once it's created, you will be able to reuse that same content on other pages, too, if needed.
- Log into your agency website.
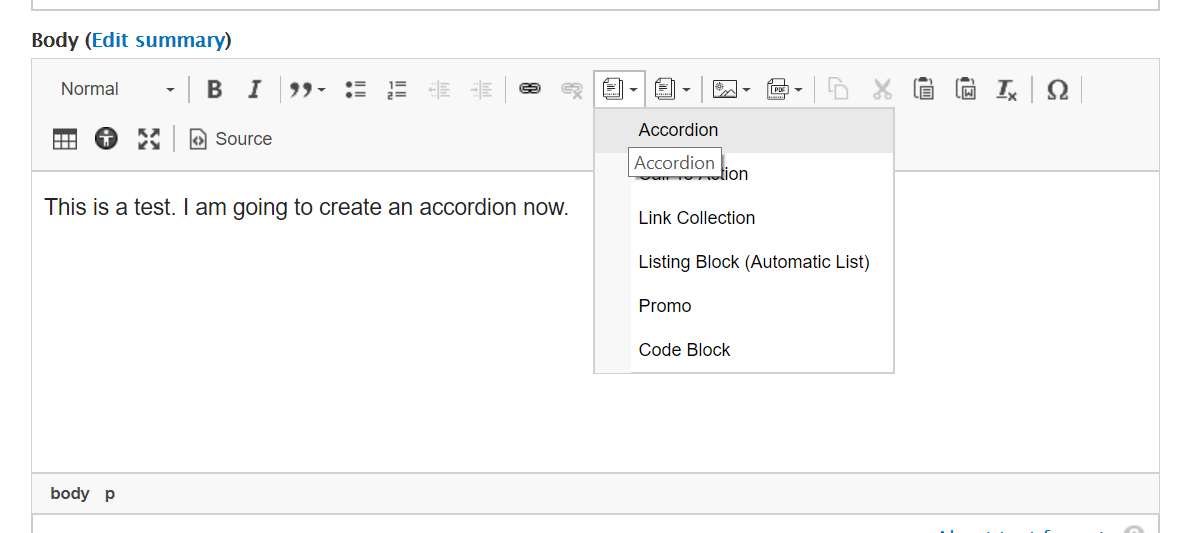
- While editing the page in which you'd like to place the collapsible content (accordion), select the embed micro-content button from the WYSIWYG Toolbar.
- Select Accordion.
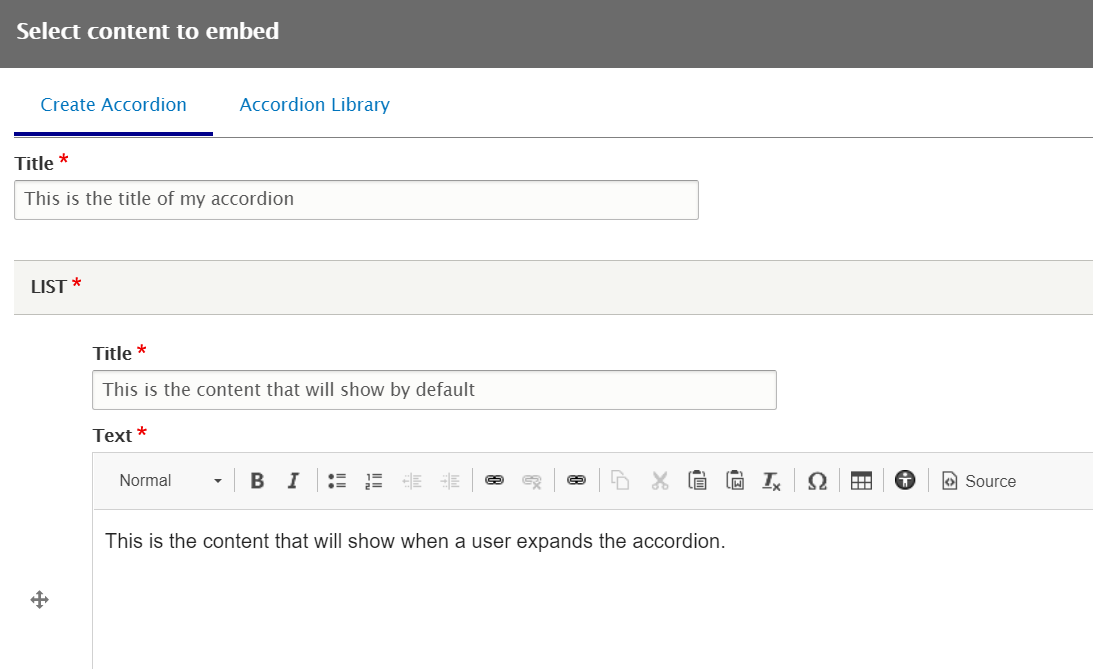
- The Create Accordion Screen will display; if you would rather select an existing accordion, use the Accordion Library tab (see screenshot).
- Add Title (required).
- The Title is required so the Accordion can be found in the back-end of the system. It will not display on your page.
- Within the List portion of the screen, start building your collapsible content.
- Add Title and Text for each group of collapsible content.
- Note: The Title will show by default; the Text will display when the user expands the accordion.
- After adding the first group, use the Add Another Item button to add more groups of collapsible content.
- You can use the + handles to the left of the text area to drag and drop the order/placement of your groups.
- Add Title and Text for each group of collapsible content.
- When you have added all of the content, ensure the Published checkbox is checked, and click the blue Save button to save your Accordion.
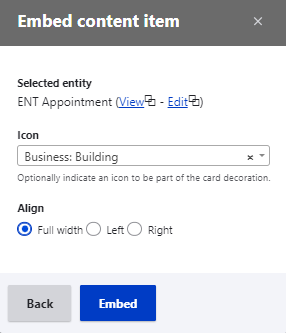
- After saving, you will be back in the context of your original page's WYSIWYG. The system will ask you how you would like to embed your new Accordion relative to other content on your page.
- Note: Accordions work best when Full Width is selected.
- After selecting Full Width, click Embed. You will now see the embedded icon indicator in your WYSIWYG editor.
- Finish editing your page's content and Save and Publish as normal.
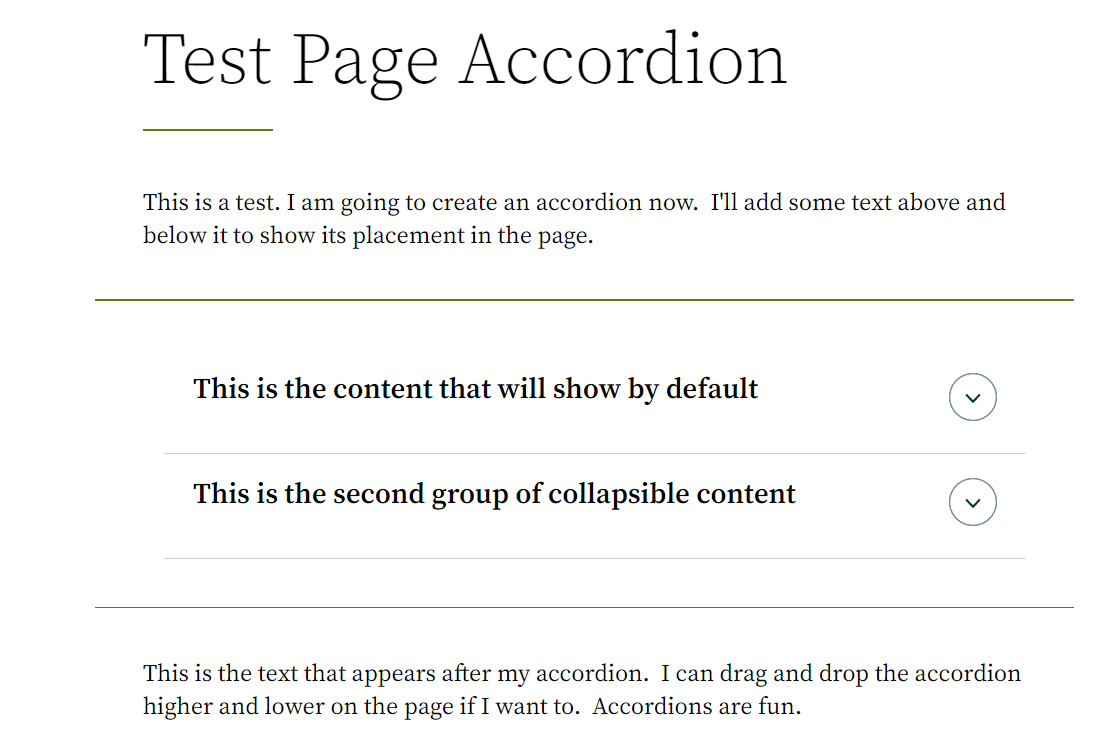
- Review your Accordion in the context of your page.
How to Edit an Accordion
After you've created an Accordion, you may need to edit it.
Accordion
If the Accordion is used in multiple pages, edits that you make will impact every placement of the Accordion.
Edit the Accordion in the Page
- Navigate to the page where the Accordion is in use.
- Select Edit.
- Double-click the Accordion placeholder in the WYSIWYG.
- Select Edit.
- Edit the content of your Accordion in the same way that you added content initially (see above).
- When you are finished editing, select Save.
- You will now be shown the updated Accordion. If it looks good, close this window to return to your original page.
- Close the Embed window.
- Make any other needed updates to your containing page, and then Save and Publish your content as usual.
Edit via the Micro-Content Library
- If you would like to edit the Accordion directly, without editing the containing page, you can navigate to it via the Micro-Content Library.
- To get to the library, click Content at the top left of your window.
- Use the Micro-Content Library tab.
- Find the Accordion in your micro-content library, and click the title.
- Use the Edit link and then edit your Accordion as described above.
Embed an Accordion in Other Pages
You can reuse an Accordion across various pages in your site.
To reuse an existing Accordion:
- From the WYSIWYG toolbar on the page where you want to embed your existing Accordion, select the Embed Micro-Content button.
- Select Accordion from the list of Micro Content.
- From the Select Content to Embed window, select the Accordion Library link at the top of the screen.
- Select the Accordion you wish to embed and click on "select" at the bottom of the page.
- To add an Icon to the Accordion, click the drop down arrow and select the Icon.
- Select the placement of the embed content (we recommend always using Full Width for Accordions).
- Select Embed.
- Finish edits to your containing page, then Save and Publish as usual.