/
Video
Video
How To Add a Video
Videos are not directly hosted or uploaded to the CMS. Instead, host your Video on an external provider such as YouTube or Vimeo. When your video is accessible on YouTube you can embed it on a page within your website. Videos are considered Media Items on the platform. You may add a video directly to a page via the WYSIWYG (most common) or you may add it to the media library to access later.
Add a Video to a Page
- Login to your agency website.
- Create or Select the page to which you'd like to add the Video.
- Select Edit.
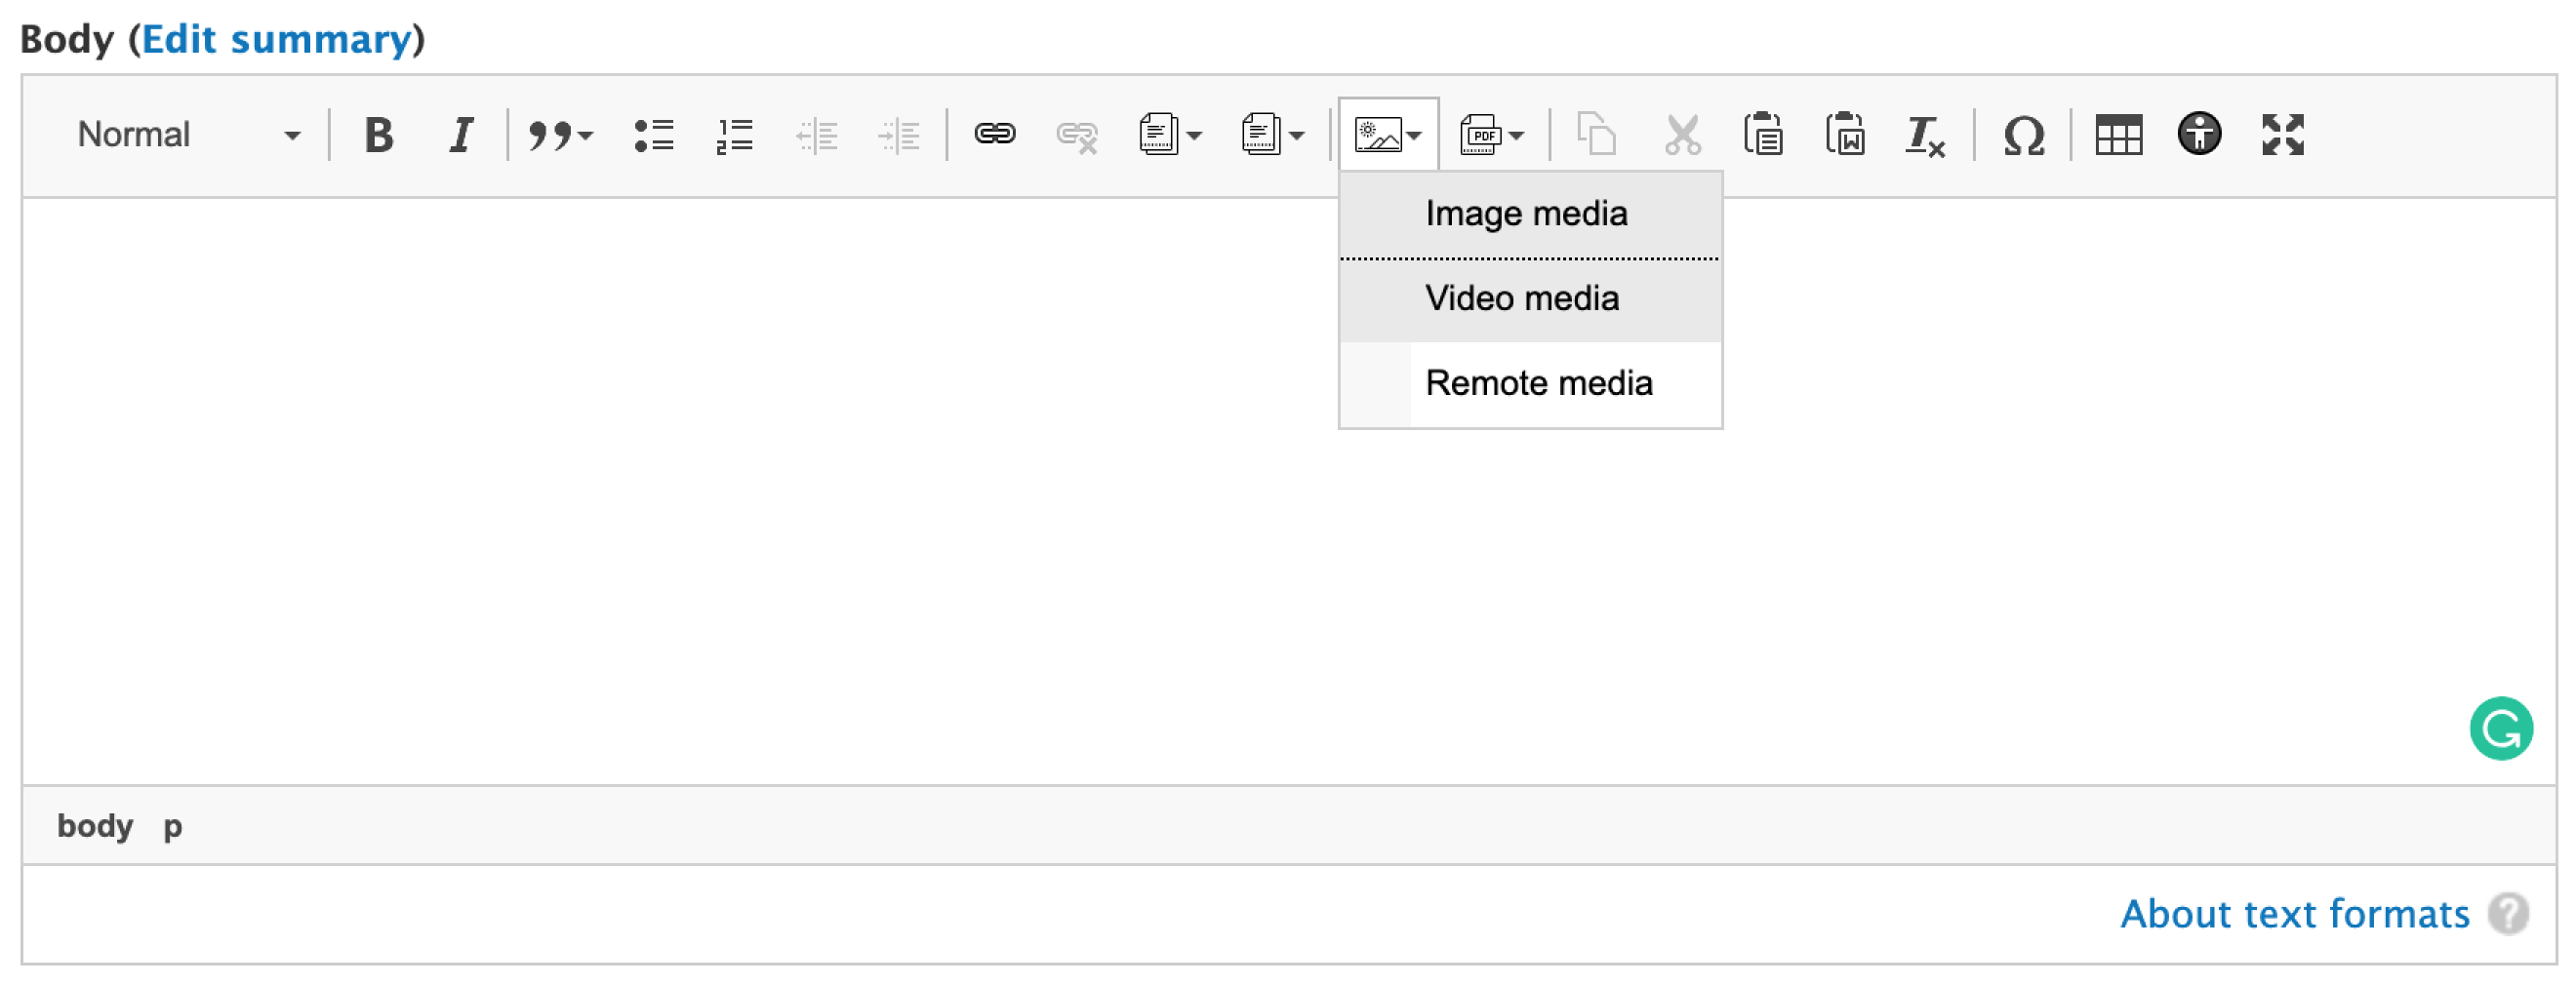
- In the WYSIWYG box, click the Embed Media icon.
- Select Video Media.
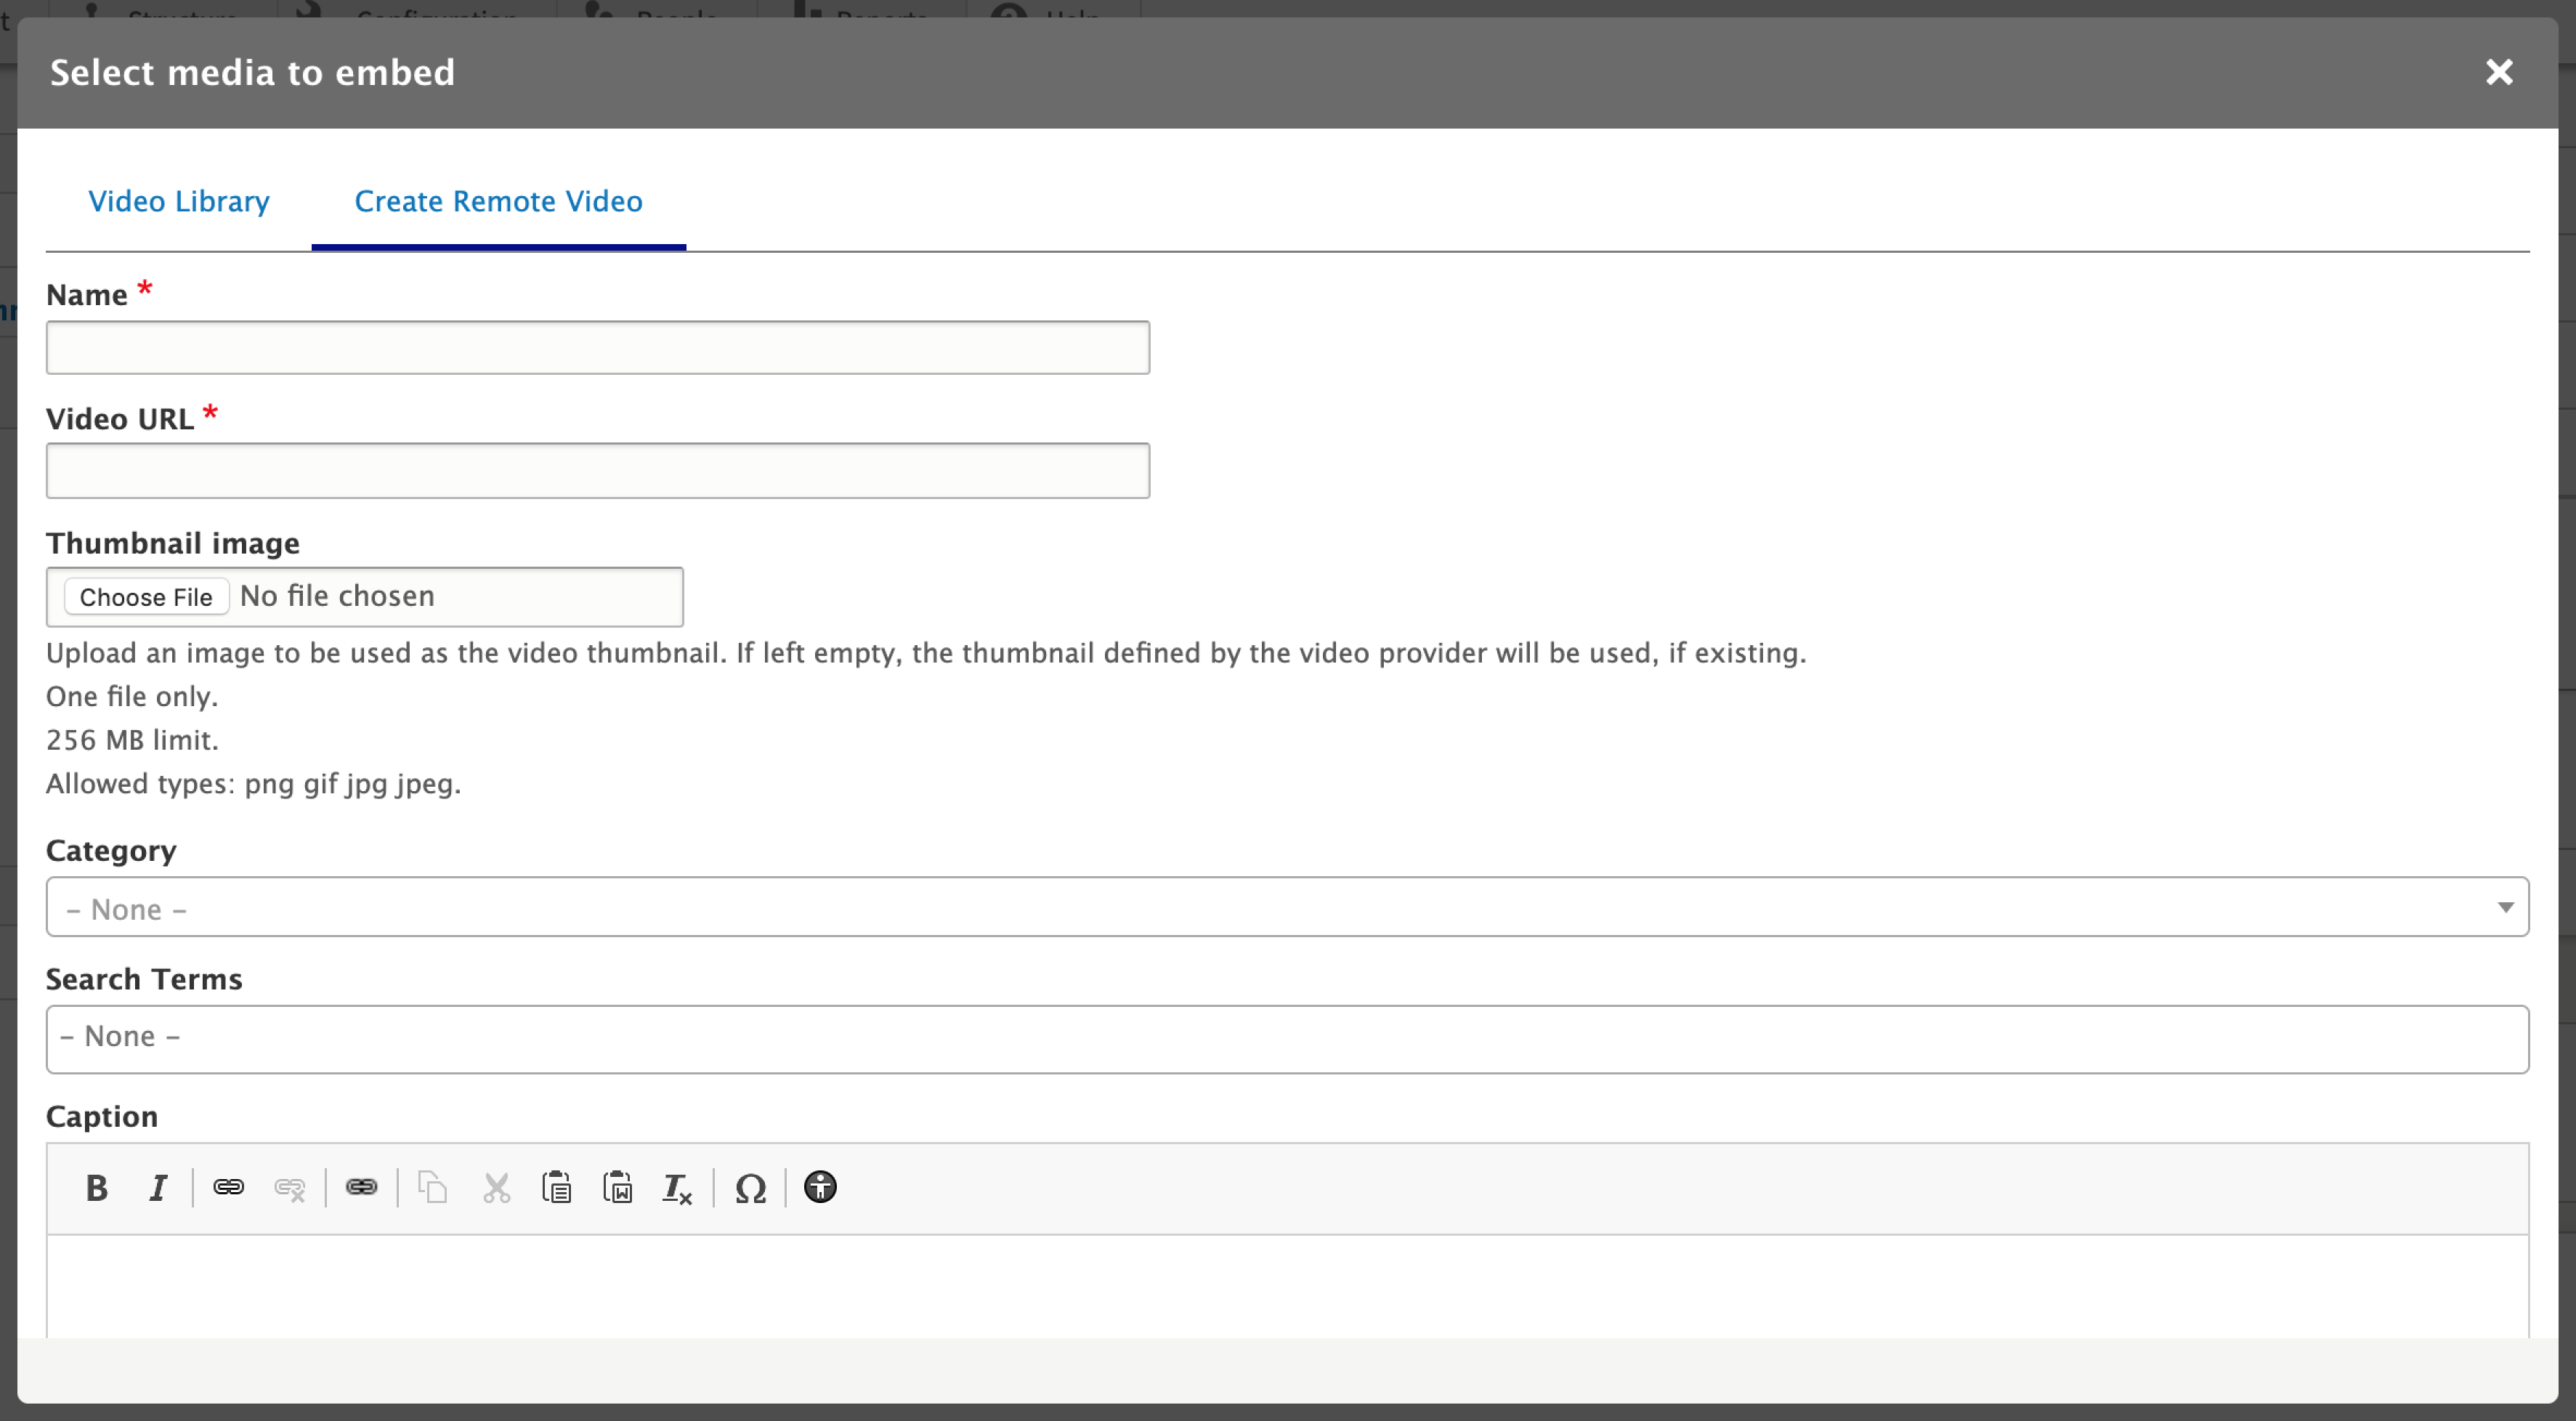
- Select an existing Video from the Video Library or Click Create Remote Video at the top of the selection screen.
- Enter a Name for the video (required).
- This is so that you can find the Video within the system later.
- Enter the Video URL (required).
- Add a Thumbnail Image (optional).
- Select or upload an image to be displayed if the Video should appear as a thumbnail size. If no image is uploaded, the video provider will determine the thumbnail image.
- Add a Category (optional).
- Select a Category of content to associate with the video.
- Enter Search Terms (optional).
- If you want this Video to be more find-able when users search in the site search box.
- Enter a Caption (optional).
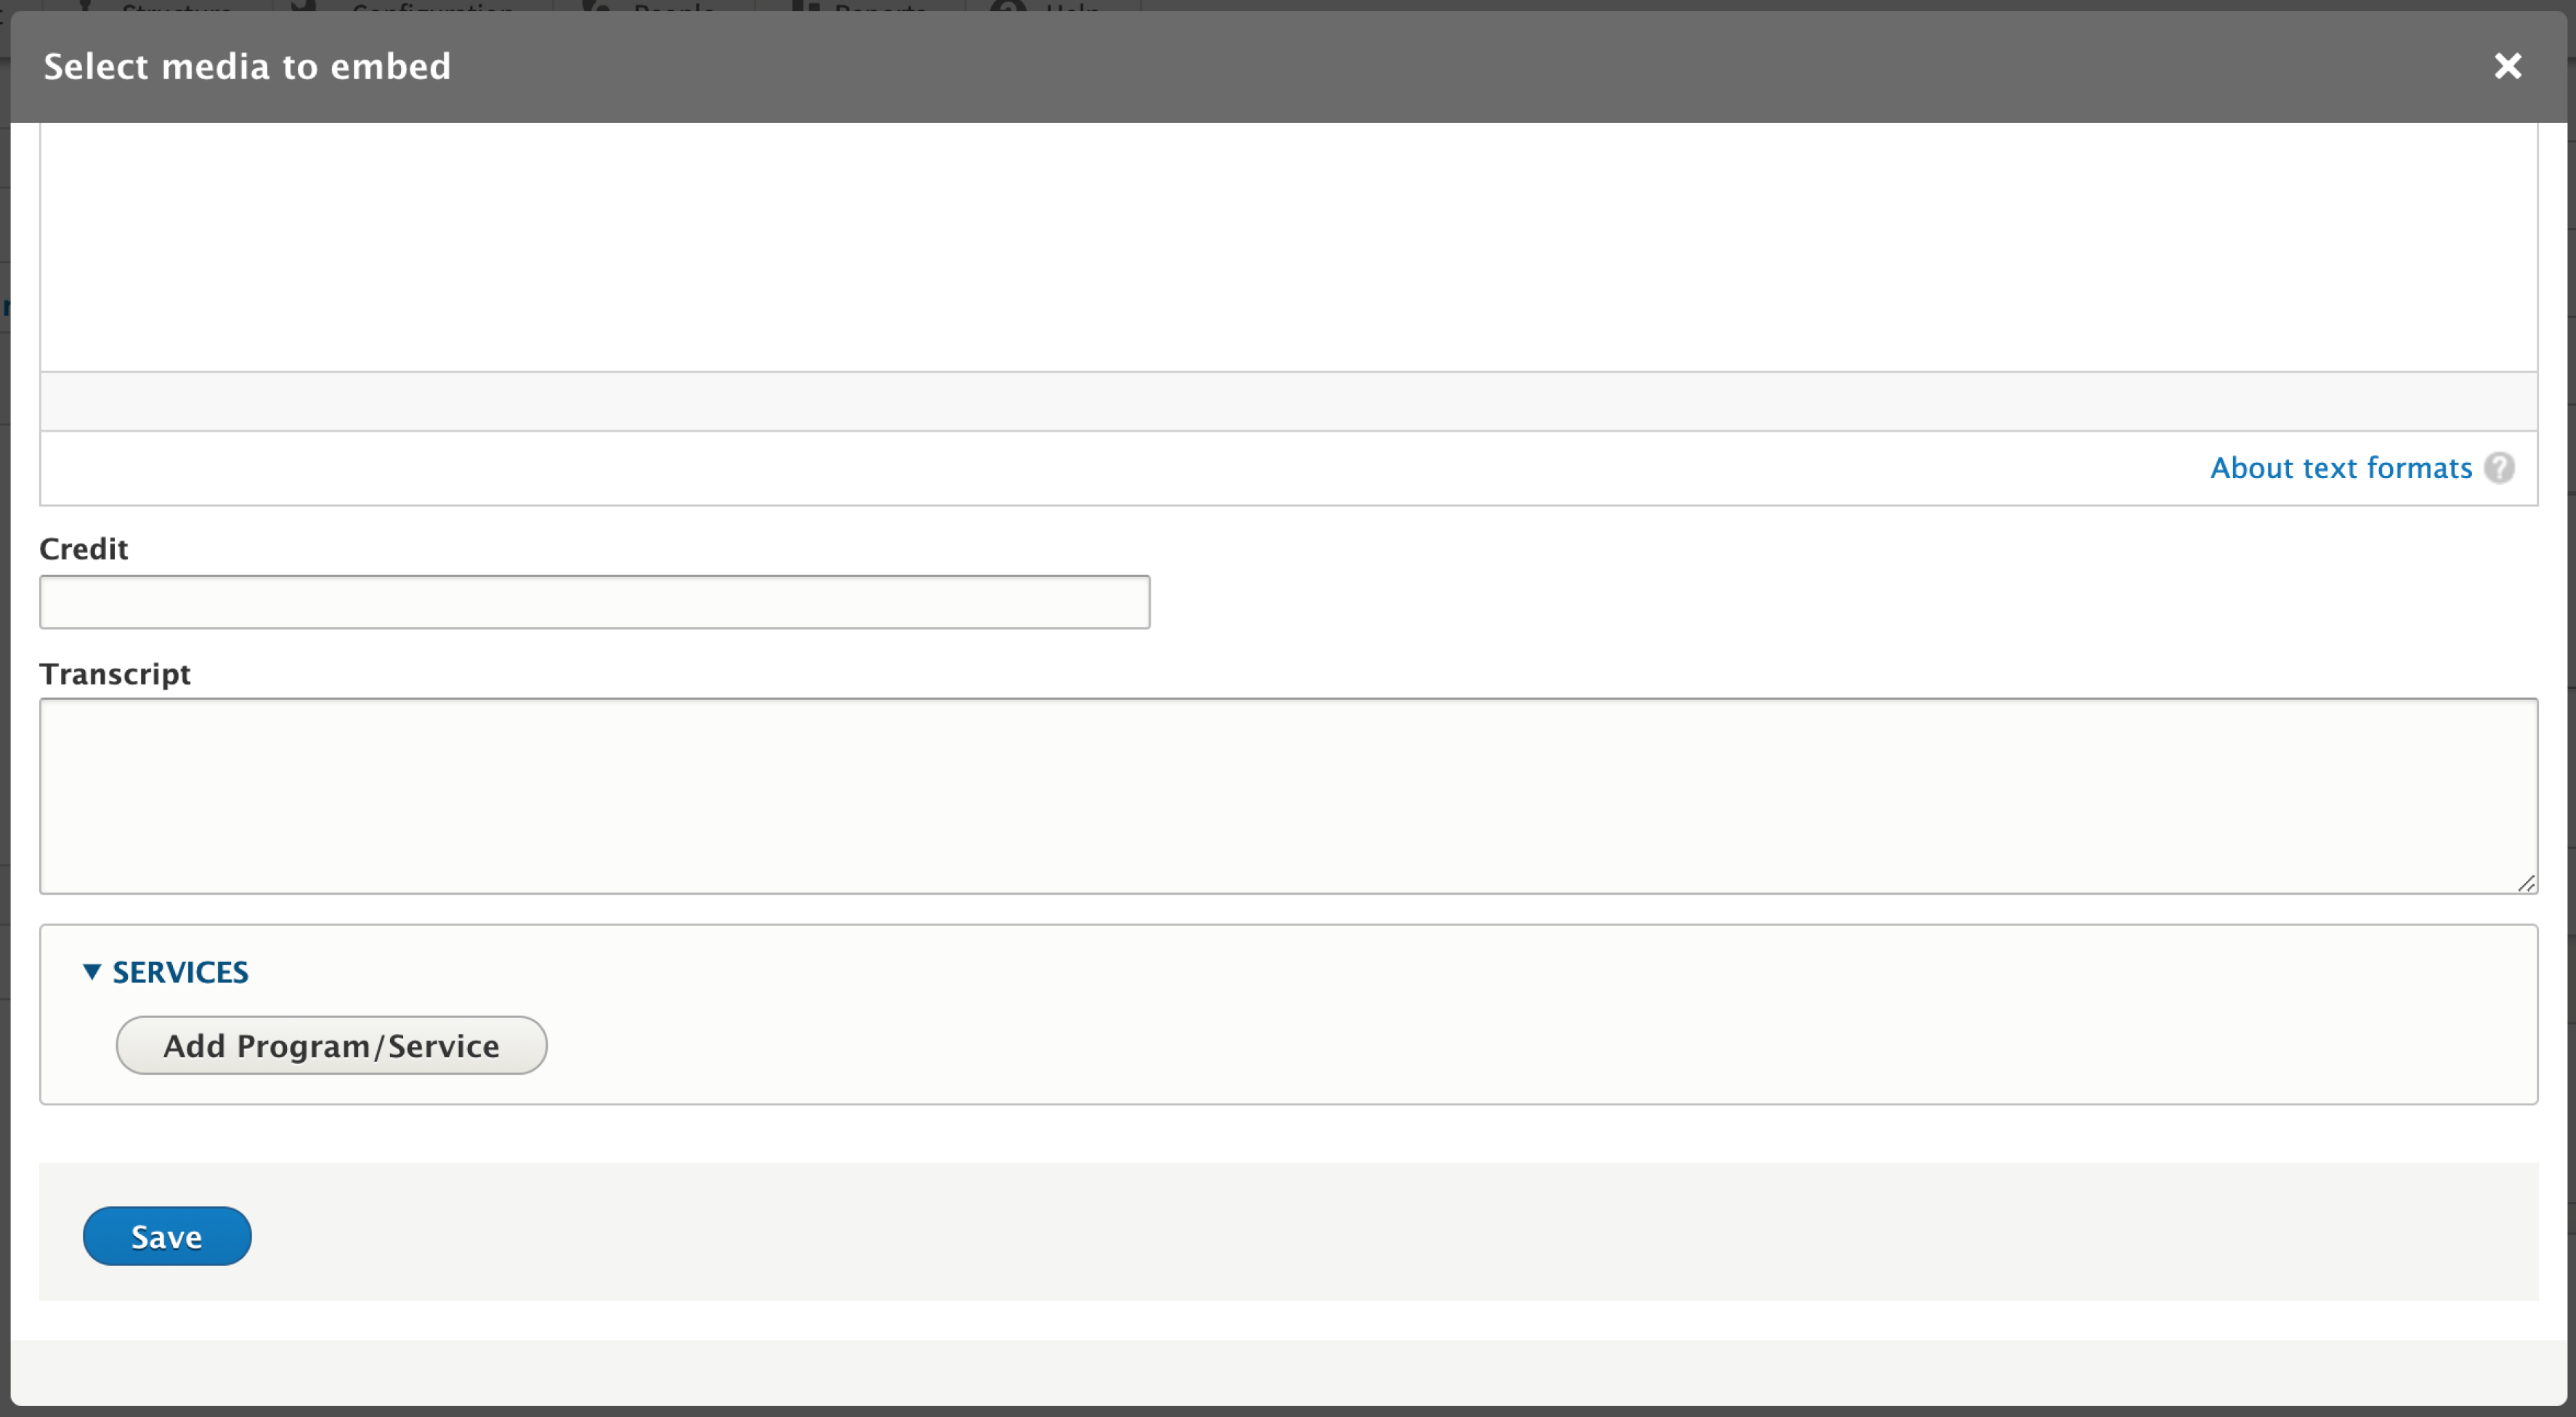
- Enter a Credit (optional).
- Copy in a Transcript (optional).
- Select a Program or Service (optional).
- Click Save.
Add a Video to the Media Library
- Login to your agency website
- Select Content from the Admin toolbar.
- Select the Media Tab.
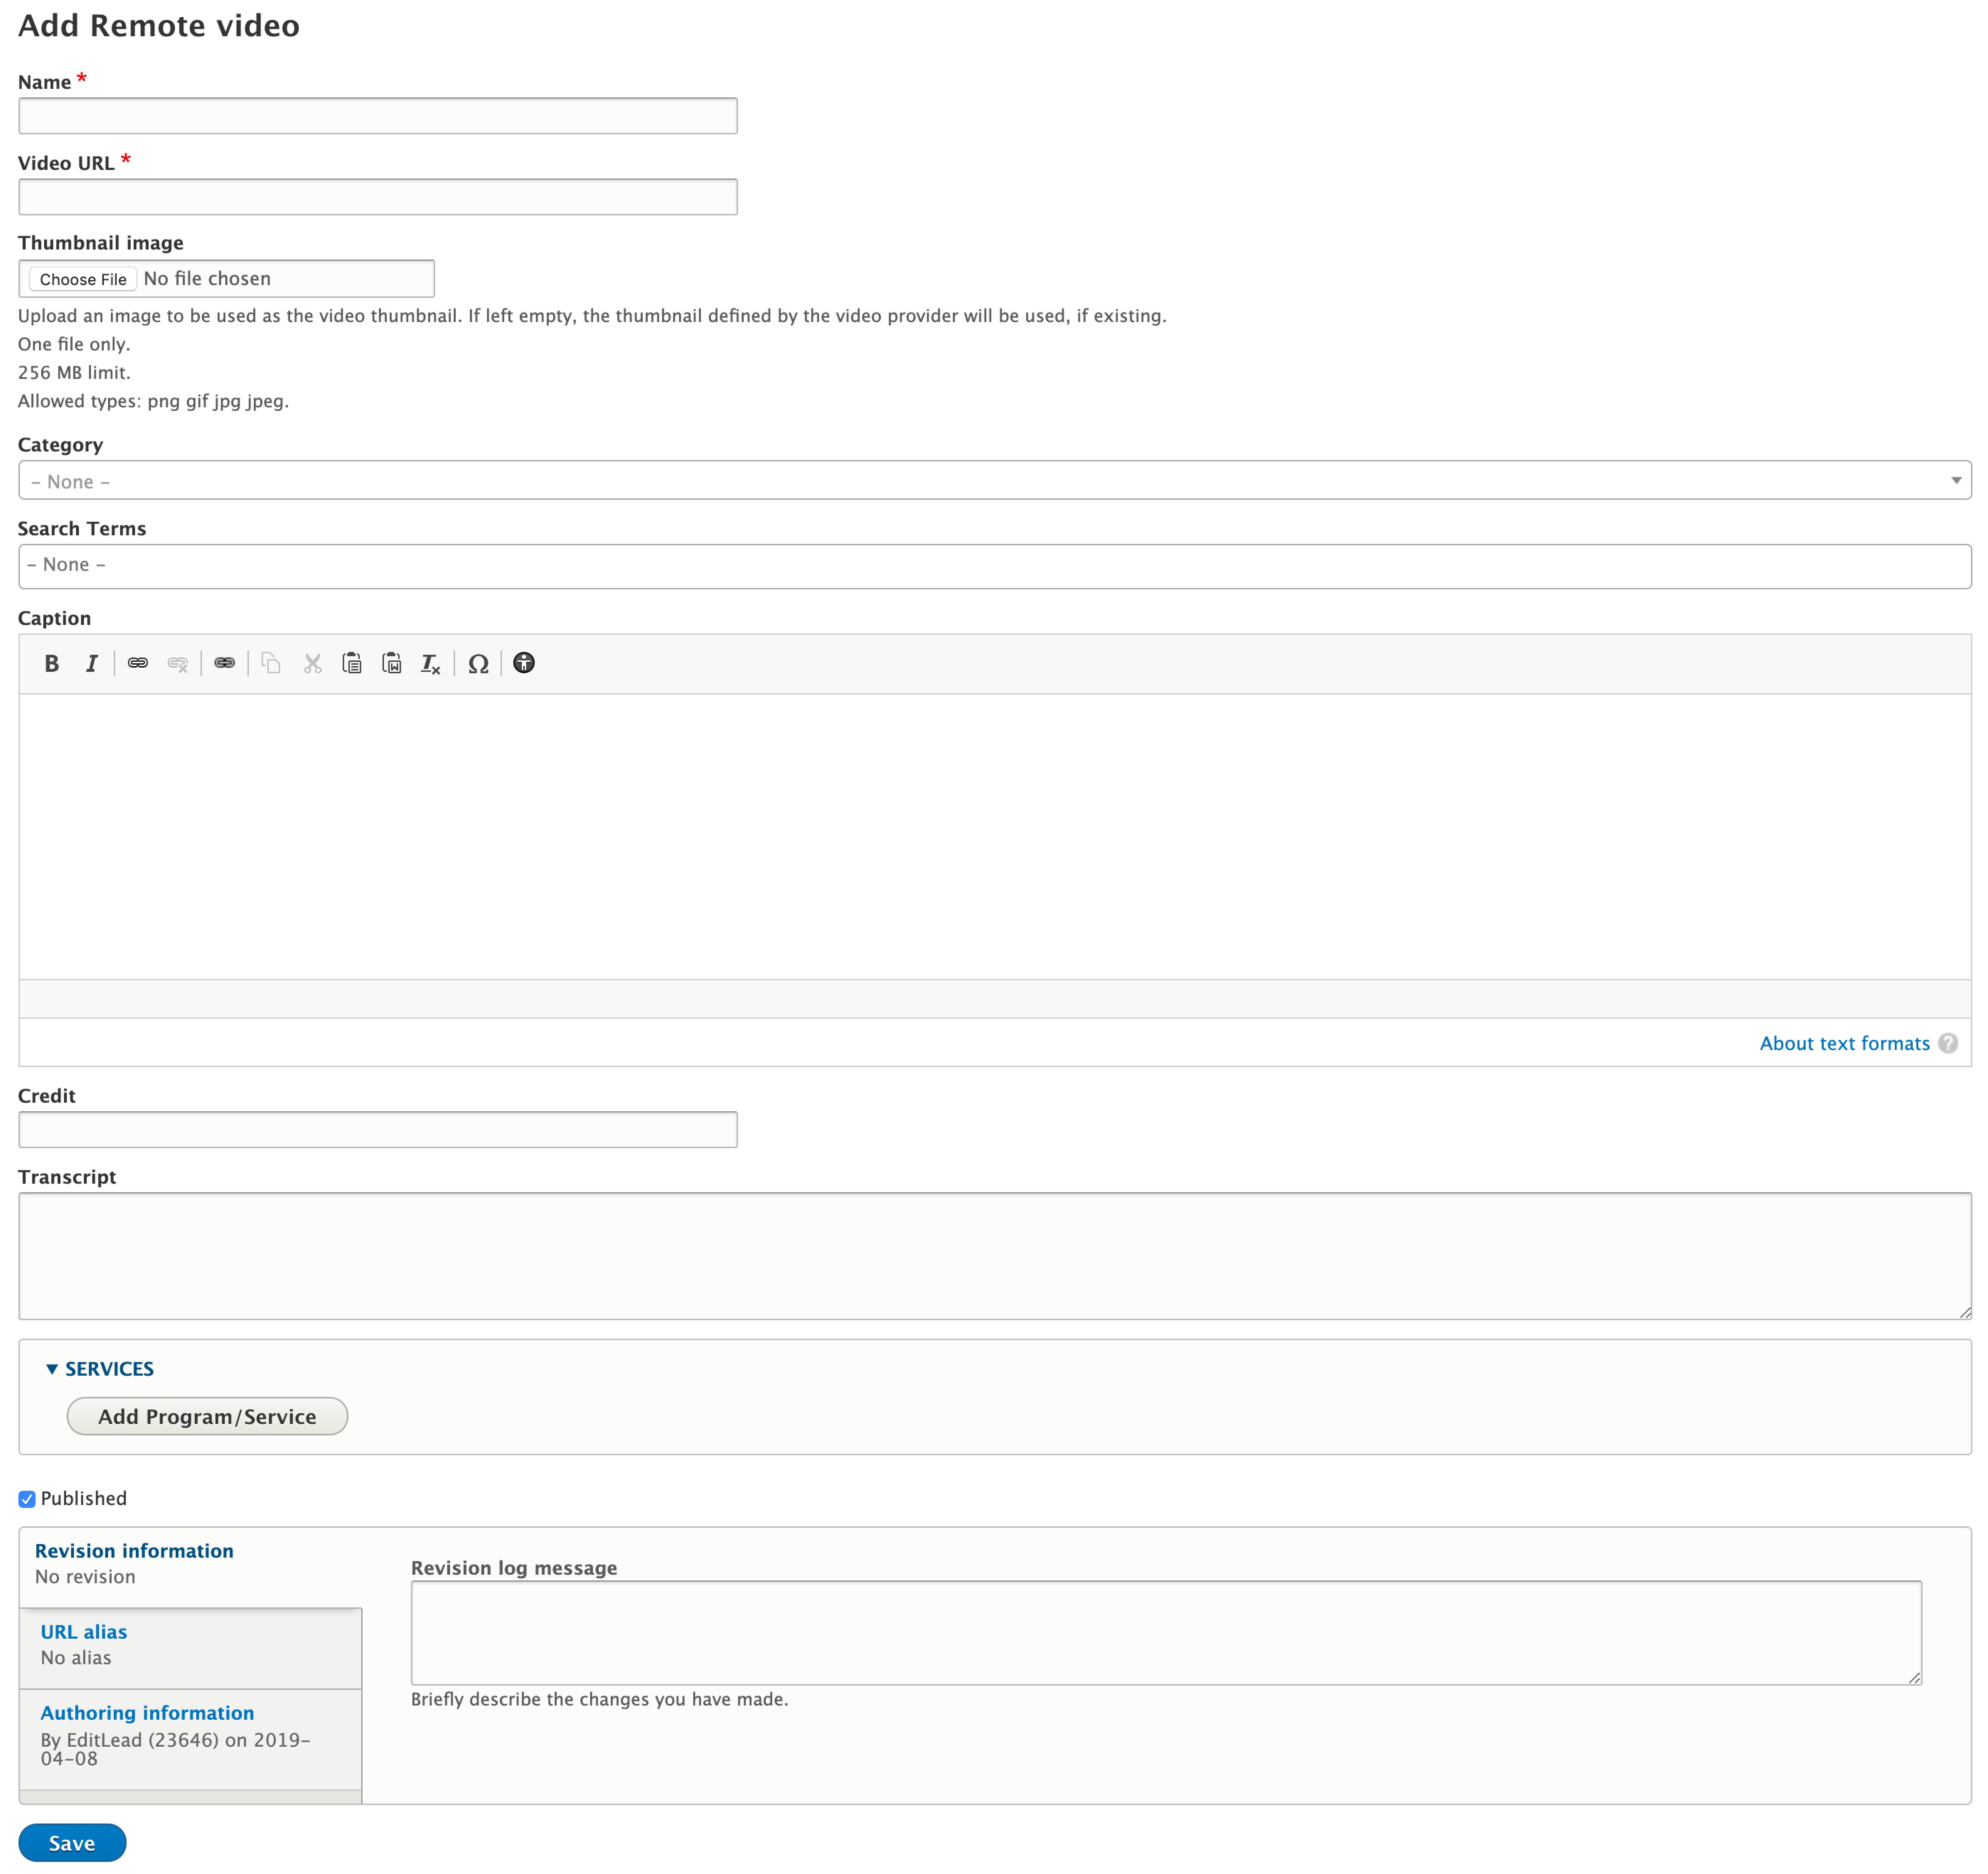
- Click the Add Media button.
- Select Remote Video.
- Enter a Name for the video (required).
- This is so that you can find the Video within the system later.
- Enter the Video URL (required).
- Add a Thumbnail Image (optional).
- Select or upload an image to be displayed if the Video should appear as a thumbnail size. If no image is uploaded, the video provider will determine the thumbnail image.
- Add a Category (optional).
- Select a Category of content to associate with the video.
- Enter Search Terms (optional).
- If you want this Video to be more find-able when users search in the site search box.
- Enter a Caption (optional).
- Enter a Credit (optional).
- Copy in a Transcript (optional).
- Select a Program or Service (optional).
- Select the Published check-box.
- Click Save.
The video is now available to be embedded in pages across the website.
How to Remove a Video from the Site
To remove a video, first determine if you want to remove the video from the site entirely or only from a certain page.
Remove the Video from one page
- Navigate to the page with the Video.
- Select Edit.
- Scroll down to the WYSIWYG and highlight the Video placeholder.
- Hit Delete on your keyboard.
- Publish the page.
Remove the Video from the Entire Site
- Navigate to the Video in the Media Library by clicking Content in the Admin toolbar.
- Select the Media Tab.
- Locate the Video you want to delete.
- Select the drop-down in the Edit button in the Operations column.
- Select Move to Trash.
- Note: Check the Usage Tab to be sure that you're aware of all of the pages that will be impacted by deleting this Video. If you do not want to delete the Video, select Cancel.
- Move to Trash if you're sure that you want to move the item to the trash bin.
Once the item is in the trash bin, public users will no longer see the Video on the site.
How to Add a Video to a Landing Page
Refer to Adding a Video to a Landing Page.
, multiple selections available,
Related content
Event
Event
Read with this
Program or Service
Program or Service
Read with this
Super Service
Super Service
Read with this
Elbert
Elbert
Read with this
Publishing Content
Publishing Content
More like this
Effingham
Effingham
Read with this


